
DIY Sofa That Slides Out Into A Bed | Sprinter Campervan
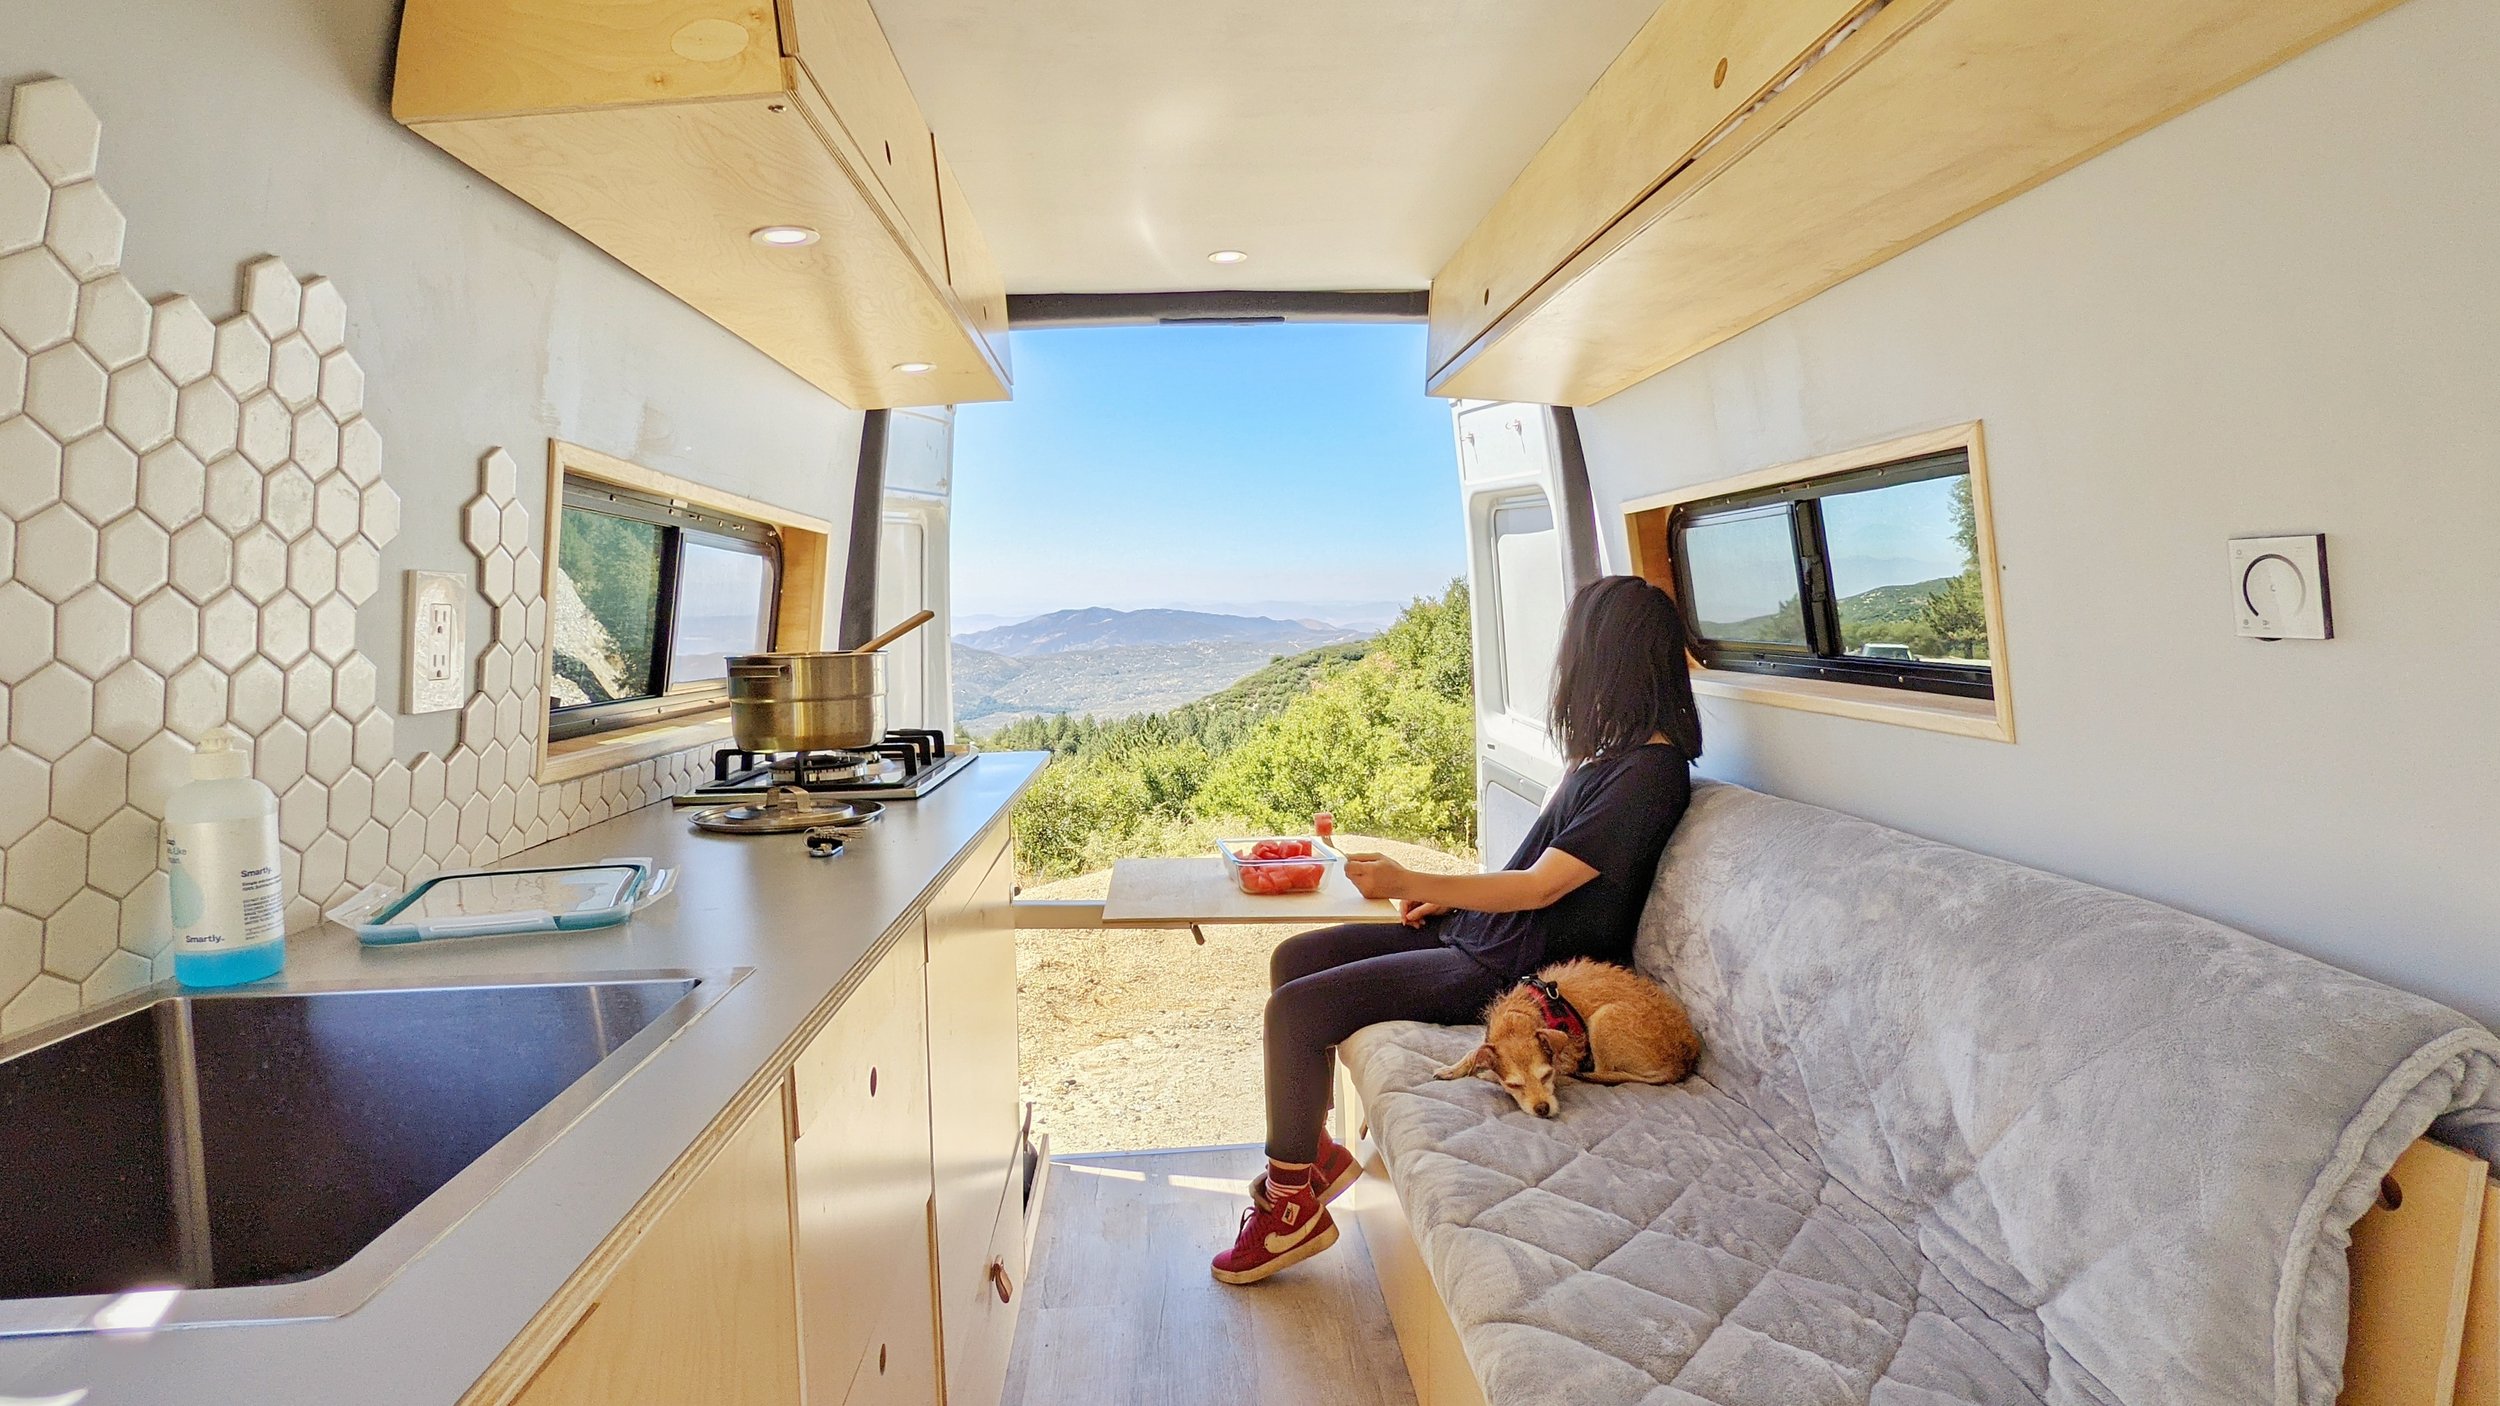
Hi! We’re Laura and Louis. We built a sofa that slides out into a bed for our Sprinter camper van, and today’s the day we share how we did it!
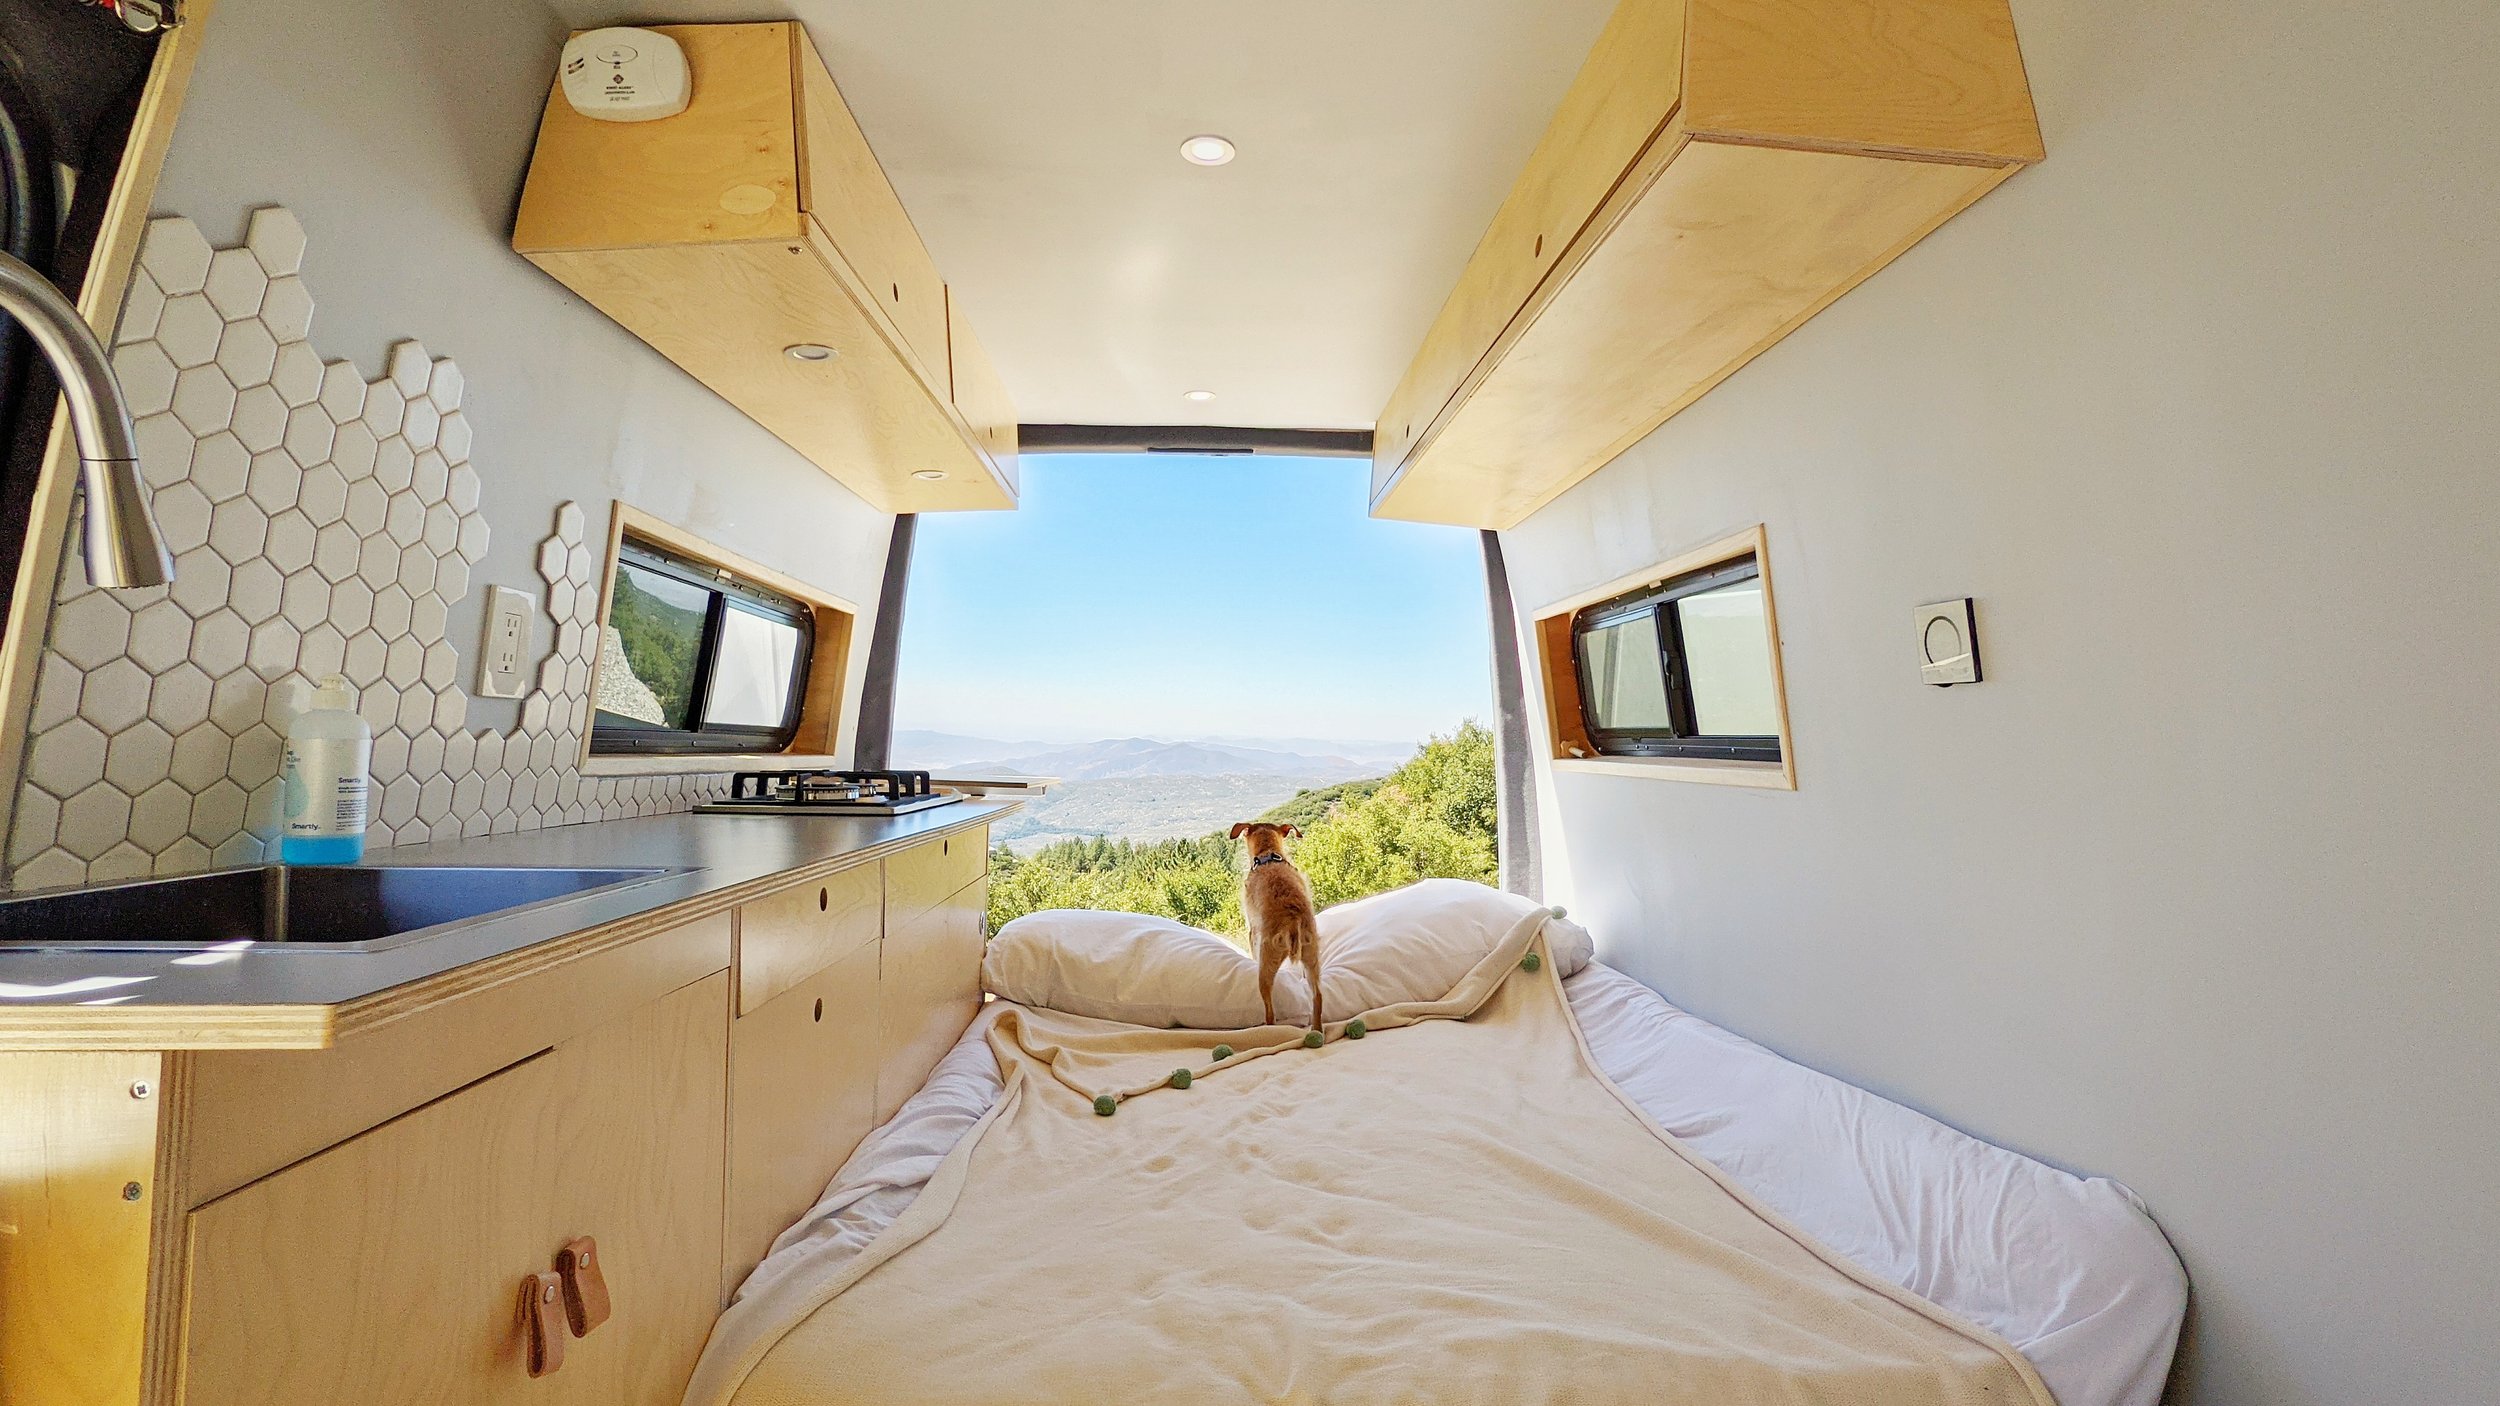
We’ve used this sofa/bed for over a year now, and can vouch for its ease of use. It’s also comfortable and straightforward to clean. Our mattress is a shikibuton, a traditional Japanese mattress, and it sits on a multiple-piece platform that folds down into a bed on three 250lb drawer slides. The shikibuton is about 2-3 inches thick, so it’s comparable to a firm mattress, which is our preference.
A disclaimer before we get into the build: We didn’t take the time to properly design the bed before starting the project. We knew that we generally wanted it to serve two functions by folding into a sofa and extending out into a bed, so we had a rough idea to start and made the rest up as we went. To help make the build easier to follow, we made a 3D model to help illustrate the order of operations. Click the button below to access the 3D model for free!


We used ½” plywood for the carcass, platforms, and storage faces. To be honest, the ½” plywood had too much give and sagged slightly in between the drawer slides when we sat on top, so we ended up adding additional supports underneath the bed, which you will see later during our build. We suspect if we used ¾” plywood instead, it may have circumvented that issue so we encourage others attempting this built to take that into consideration.
The overall bed dimension when pulled out is 75” x 50” (L x W), which is approximately a full sized bed.
In sofa position, the seat is 19” deep and 16” high. We intentionally chose to top our furniture height at 16” because I (Laura) am 5’ 0.5” on a good day, and my feet touching the ground was an important consideration.
A list of everything we used is linked below:
Leather Screw Fasteners: https://amzn.to/3pS8oly
12 x 12” Tanned Leather: https://amzn.to/3pSJrX9
3” Strap: https://amzn.to/3snR3oJ
24” 500lb Full extension drawer slides: https://amzn.to/3nkMgib
2.5FT Piano hinge: https://amzn.to/3hNqhPs
Soft close hinges: https://amzn.to/3s9AzP1
Full Size Japanese Shiki Futon: https://amzn.to/2LobUVQ
Non-slip cushion Velcro: https://amzn.to/35kWgBK
Get 15% OFF on Starbond CA Glues with our promo code IMEEMADE15 https://www.starbond.com/?rfsn=4627514.f53079
The walls of the van are curved, which requires one side of the furniture to be slightly curved to sit flush against the wall. To quickly determine the curve, we taped two carpenter’s pencils together to trace the arc of the wall onto a scrap piece of wood.

Then we used that as a template to cut the side pieces of the bed frame out of 12mm Baltic birch plywood.


We also made a template with a cutout for the wheel well. This piece will support the middle of the bed, so we doubled up for extra thickness. Since we used pre-finished plywood, we had to sand down the faces so the wood glue can properly adhere. After sanding, we spread the glue all over one face and clamped the two pieces together


Then we cut 3 inch strips to act as horizontal stretchers that connect the side panels, creating the general structure of the bed frame. We made sure to place the supports that will sit against the wall of the van at the height of the baton behind the walls, so we can screw directly into them.


We connected everything using pocket holes and 1” screws. One thing to note when using pocket holes is to have the holes facing outside of the joint. That way, the screw fastens away from the edge and doesn’t blow out like we did here.

With the general frame completed, we brought the bed into the van to test fit. One thing we regret is screwing the frame into the wall batons on the van at this point. Doing this caused the frame to become out of square and threw off the rest of the build and we suffered. It would have been much better to assemble the rest of the bed in our garage, on a level surface, and then address the mating inconsistencies on the van with shims.


Next, we worked on installing the drawer slides. We cut a piece that positions the slides at the height we needed and screwed it into the side panels. Since these are 500lb drawer slides, we wanted to make sure there is enough vertical support for the slides and they’re not relying only on the mounting screws.


Once the drawer slides were in, we added 3inch wide stretchers just below the sliders. You’ll notice that we’re installing them differently than the 3D model shows right now. We correct it later on because we find out that it doesn’t support the bed platform in the current position.

Starting from the back support, we anchored the hinges for one section of the bed platform, which also serves as part of the couch backrest. We used long piano hinges and cut them to size because we felt that a long continuous hinge wasn’t necessary. It also saves a minuscule amount of weight.


Now that we have one section of the platform, we have a reference to secure the supporting piece for the main platform onto the sliders.
After drilling pocket holes onto a 24” x 3” piece, we used our go-to trick to help keep it in place while we fasten the screws to secure it to the slider. We used a few dabs of Starbond CA glue onto the support, sprayed the activator on the slider then press them together for a few seconds for a super strong bond. We use this trick a lot because it’s a real time saver and you don’t need an extra person to hold things up.


Next we brought over the main platform, which will serve as main seating portion at 19” deep. We attached it using the pocket holes on the support.


We thought we could get away with using a slider on each end, but the length of the platform caused it to bow in the middle, so we added another 250lb slider on the center support. As we mentioned at the beginning of the blog, in hindsight we wish we would have gone with the 3/4inch plywood because it would have been less likely to bow and cause support issues.
For the slider installation, we used Starbond glue again to hold the support in place while we predrilled and screwed everything in.

Next, we extended the bed out and added the last piece of the platform with piano hinges.

We then traced and cut off any overlap so all the pieces can lay flat in bed mode.


DO NOT cut your wood pieces like this! We were being lazy and didn’t want to remove the piece to cut it properly. Do as we say, not as we do. Please.
The last and trickiest part was connecting the two backrest pieces. We initially used piano hinges but it didn’t have enough give to flex with the back and forth movement. After mulling it over, we remembered a Laura Kampf project where she used ratchet straps as hinges, so we dug up an old strap and got to work.
We cut the strap to size, burned the edges to seal the fibers, then screwed it onto the backrest piece with a washer in between. It worked much better than the stiff piano hinges.


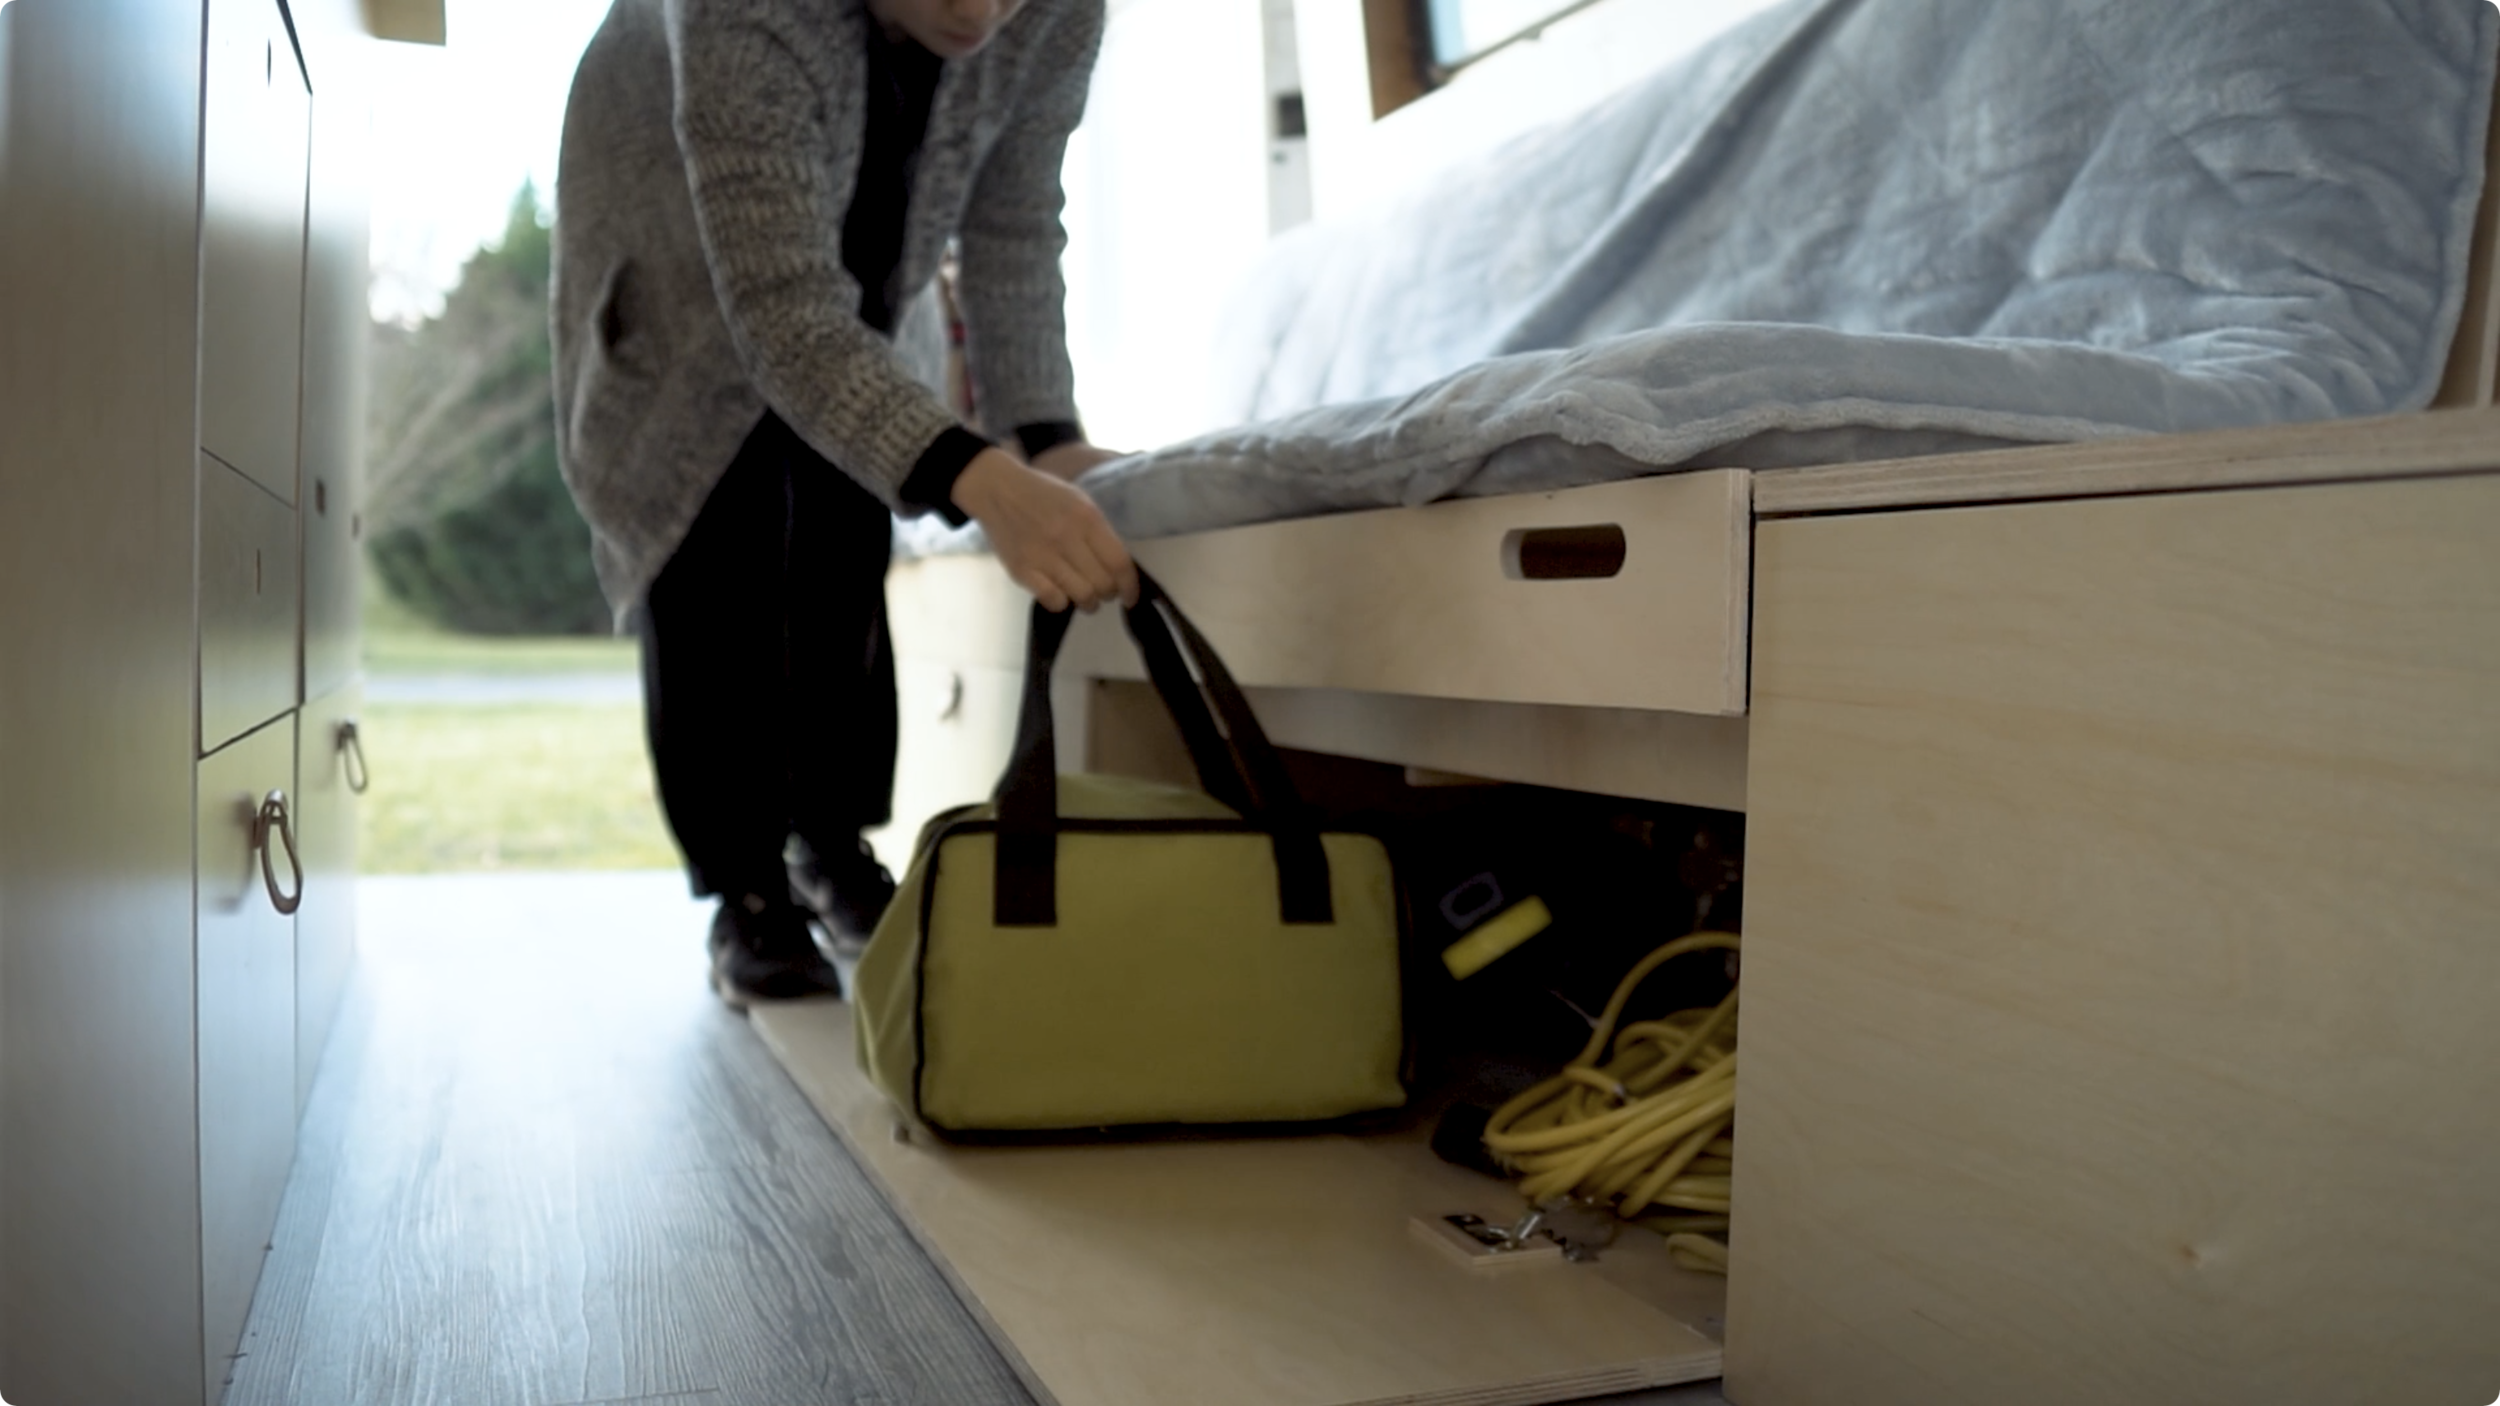
Remember when we said we’d fix the position of the stretcher? Well here we are – After removing the stretchers, we cut off an inch so we can salvage some usable space underneath for storage and re-attached it properly.


Then we added the center supports that will keep the middle of the platforms from bowing when we sit or lay on them. It is worth mentioning for a third time that had we used 3/4inch plywood, we don’t believe we would have needed this additional support.


Now that we have the main mechanics of the bed done, we moved onto making pull down door faces for the storage area. We used this handy kreg jig tool to drill a hole for the door hinges to mount. We used half inch plywood, so we needed to add a scrap piece of 1/8th inch plywood where the hinge sits so it doesn’t drill through the face. This is another moment where the 3/4inch plywood would have been handy and we wouldn’t have had to add the extra piece of 1/8th inch scrap, but I digress.

We then popped on the hinge and screwed it in place. Last but not least, we brought the doors over to attach onto the base of the bed.


To finish off the face of the couch bed, we added a strip of wood to mount on the front face of the main platform. This will be the main part we’ll use to pull out into bed mode, so we cut out a hand hold. We drilled two one inch holes a few inches apart, and then jigsawed the edges of the hole together. Easy peasy hand handle!


We secured it in place with a handful of L brackets.


Next, we drilled holes on the door faces to attach little leather pull straps that we pre-fabricated. We scooped up a thin sheet of leather on Amazon and cut them in strips to create simple, cheap, and beautiful door pulls!


Next up, we made a simple stopper for the bed to keep it in place while we’re driving around. To start, we drilled a small pilot hole through both the side wall of the bed and the platform support attached to the slider. Then we drilled a ¾” hole with a forsner bit.


To make the actual stopper, we drilled a ¾” hole partway through a piece of scrap wood so we can fit a dowel snugly in with wood glue. To make sure it’s extra secure, we drove a screw in from the top to keep it in place. After shaping the handle, we had a quick and easy stopper!


Here’s a behind the scenes look at our van bed with some recent updates such as holes in the platform for ventilation and a second hand hold slot on the slide close to the stopper.

Once the details were complete, we laid the cushion! We ordered a full size Japanese Shikibuton, which is a futon commonly used in Asian countries for sleeping. It’s only about 2-3 inches thick, but it is so much more comfortable for us than foamy plush mattresses that suck you in. We happened to have a fluffy full sized duvet cover at home that fit over the shikibuton perfectly! After setting it in place on the couch bed, we stuck on Velcro stickers that will help hold the futon in place. When in couch mode, the futon is pinned against the wall and stays in place.


And with that, we have a fully functioning bed and couch! We can quickly convert from couch to bed, by simply removing the stopper, pulling it out and flattening out the futon cushion. We store the blanket and pillows in the overhead storage above the driver’s seat so they are out of sight during the day and pull them out when we’re ready to go to bed for the night.


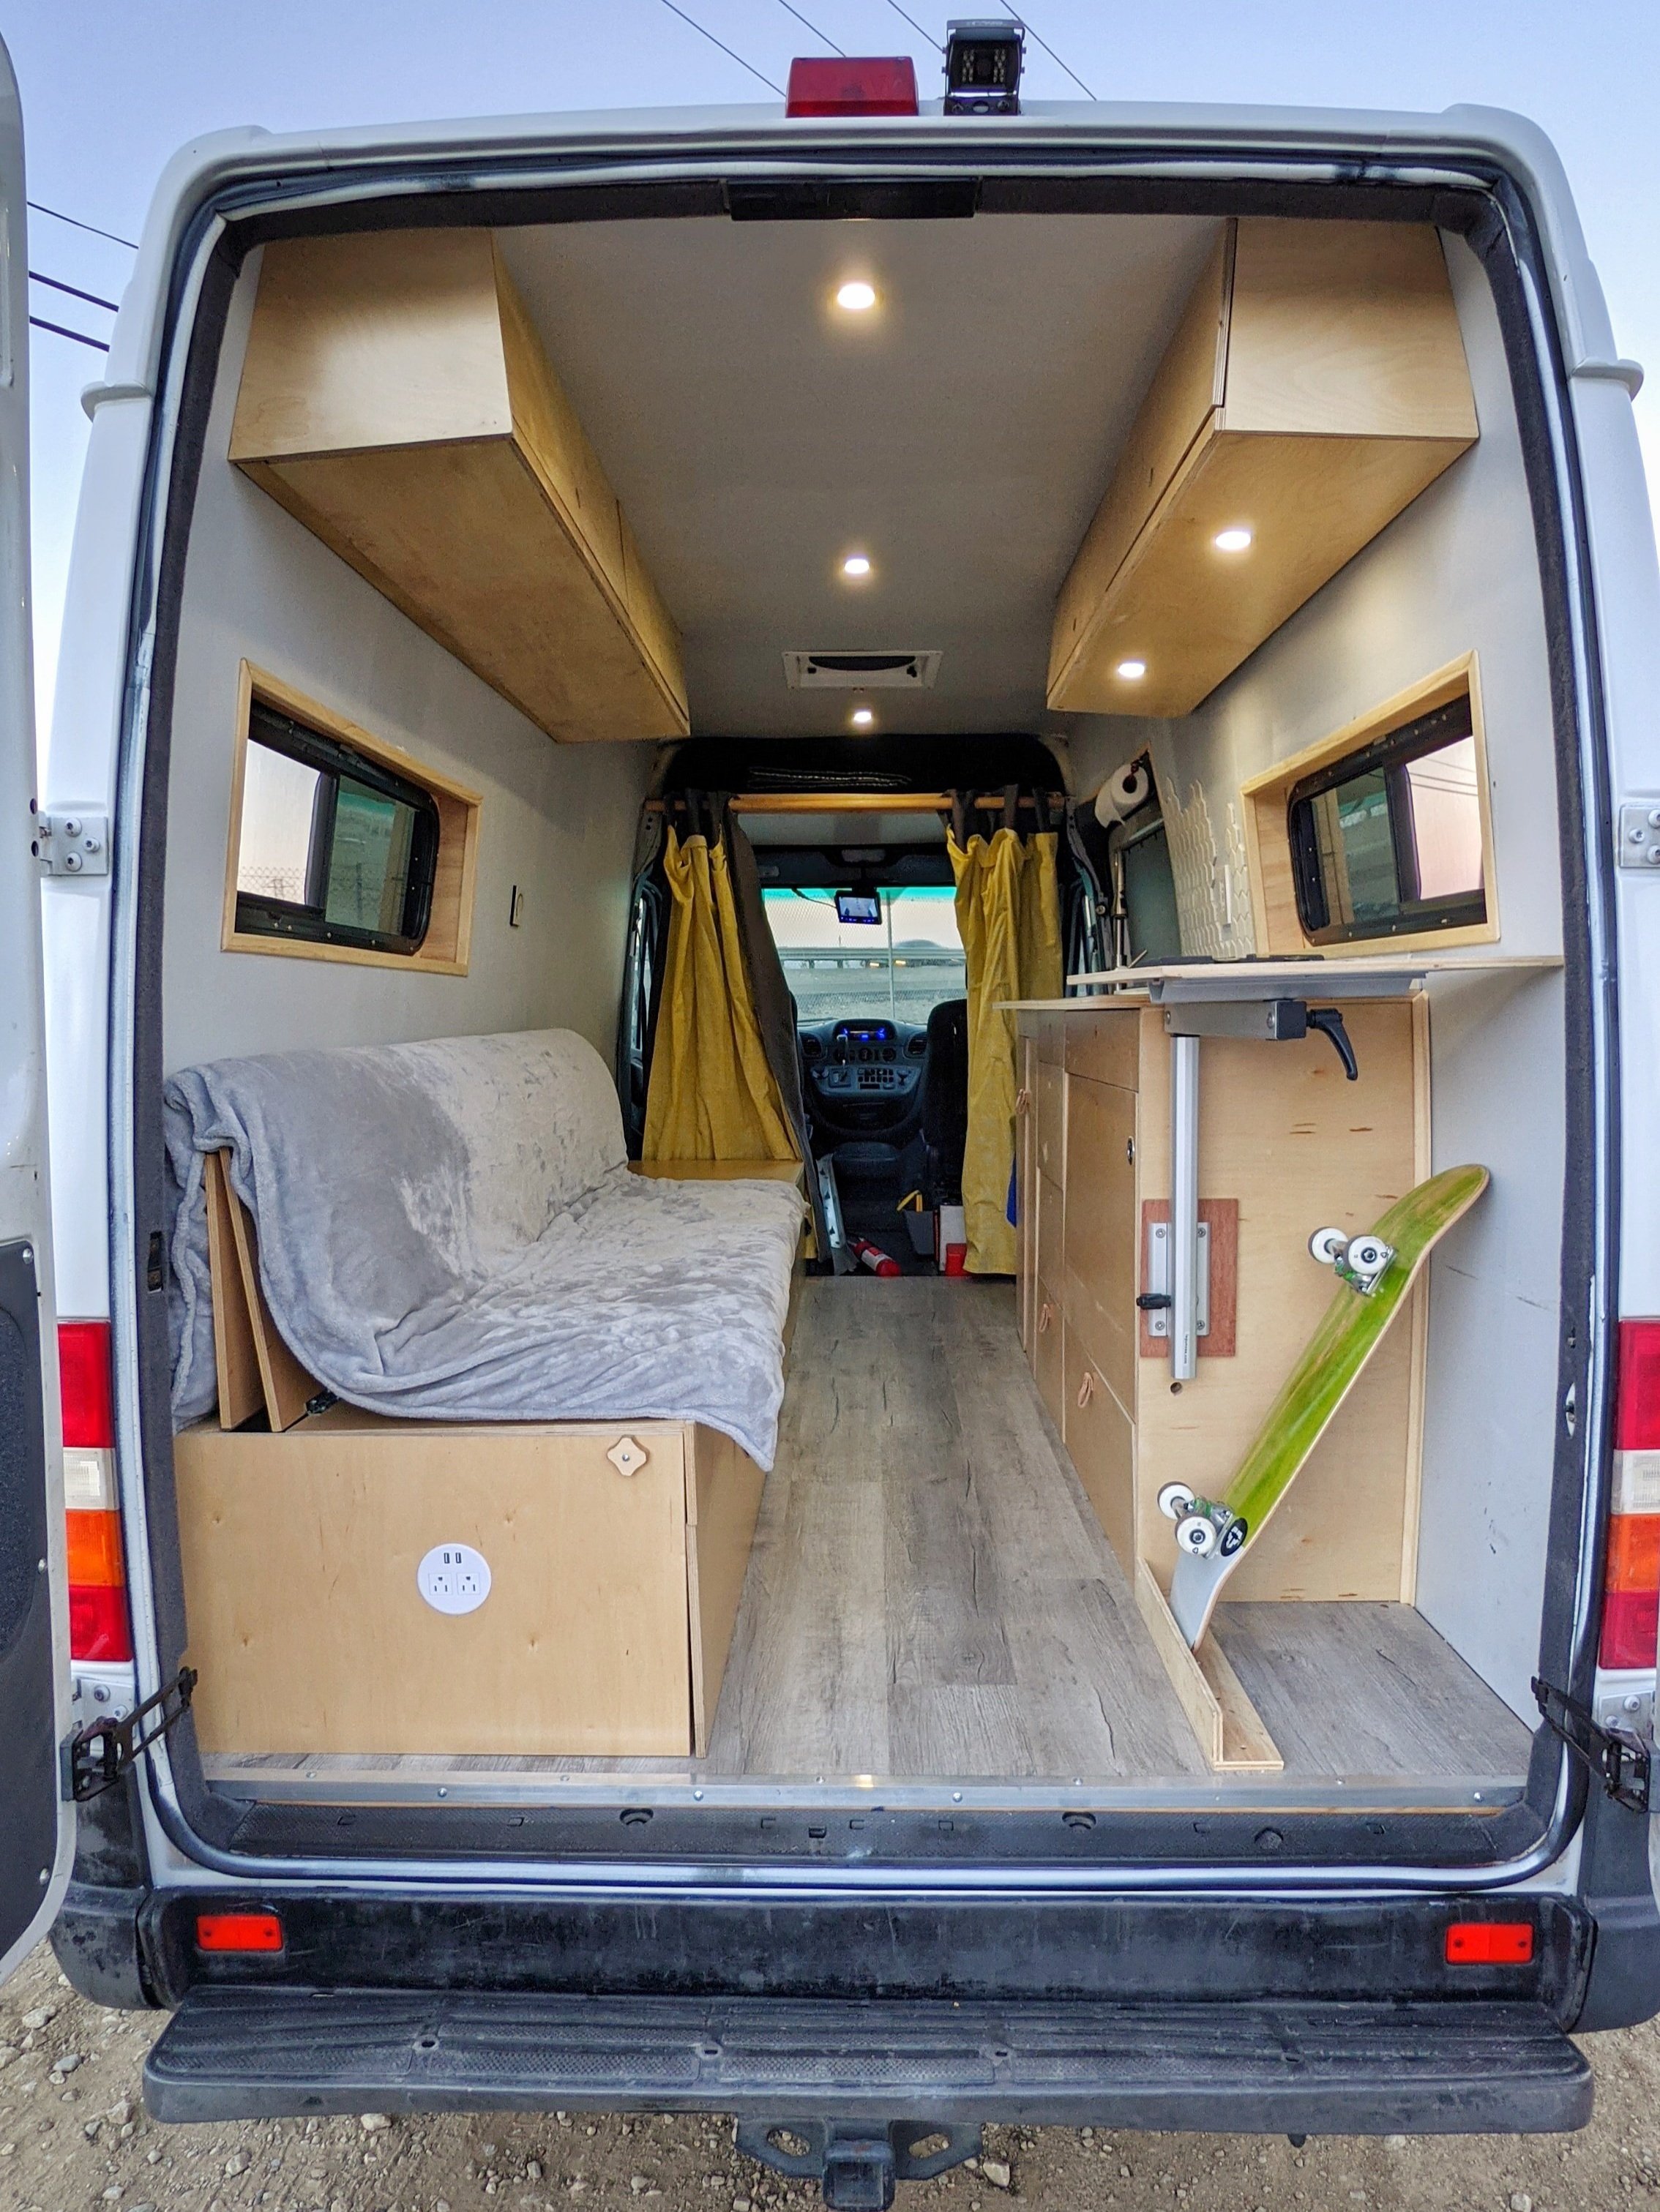
Although we struggled a bit through the build, we love how everything came together in the end. Having a space that’s multi-functional is so important when living in a small area and we’re so glad we were able to make a convertible living and sleeping space.
If you enjoyed this build, please leave a comment! We already have plans to rebuild this in the near future, so we’d love to hear suggestions for minimizing plywood and maximizing space!