
DIY Welding Table AND Assembly Table
We finished our Sprinter Camper Van recently and decided to share the adventure by having it available for rent. You can check out our listing on here on Outdoorsy!
To make sure we have a safe space to service the Camper and build more projects, we decided to lease a small warehouse space we can call our own shop!
With any new workspace, the most challenging part is organizing the layout (imho). We knew we wanted the space to be modular, meaning everything needs to be on wheels and be able to freely move around.
Luckily, Semi Exact reached out to us as part of their maker program and provided us with a set of their H-beam leg. We thought it was a perfect solution for quick and easy workbenches, so we ordered an extra set to make fraternal twin tables.
One workbench will be all metal, so we can use it freely for welding. The second workbench will have a plywood top and serve as an assembly table.
The dimension of the legs we ordered are 32" Tall and 40" Wide. We opted to go with a raw steel finish because we’re modifying them, but they offer multiple colors and finishes.
Here is the list of supplies we used: (These are affiliate links where we earn a small commission at no extra cost to you, Thank you!)
First up, the welding table!
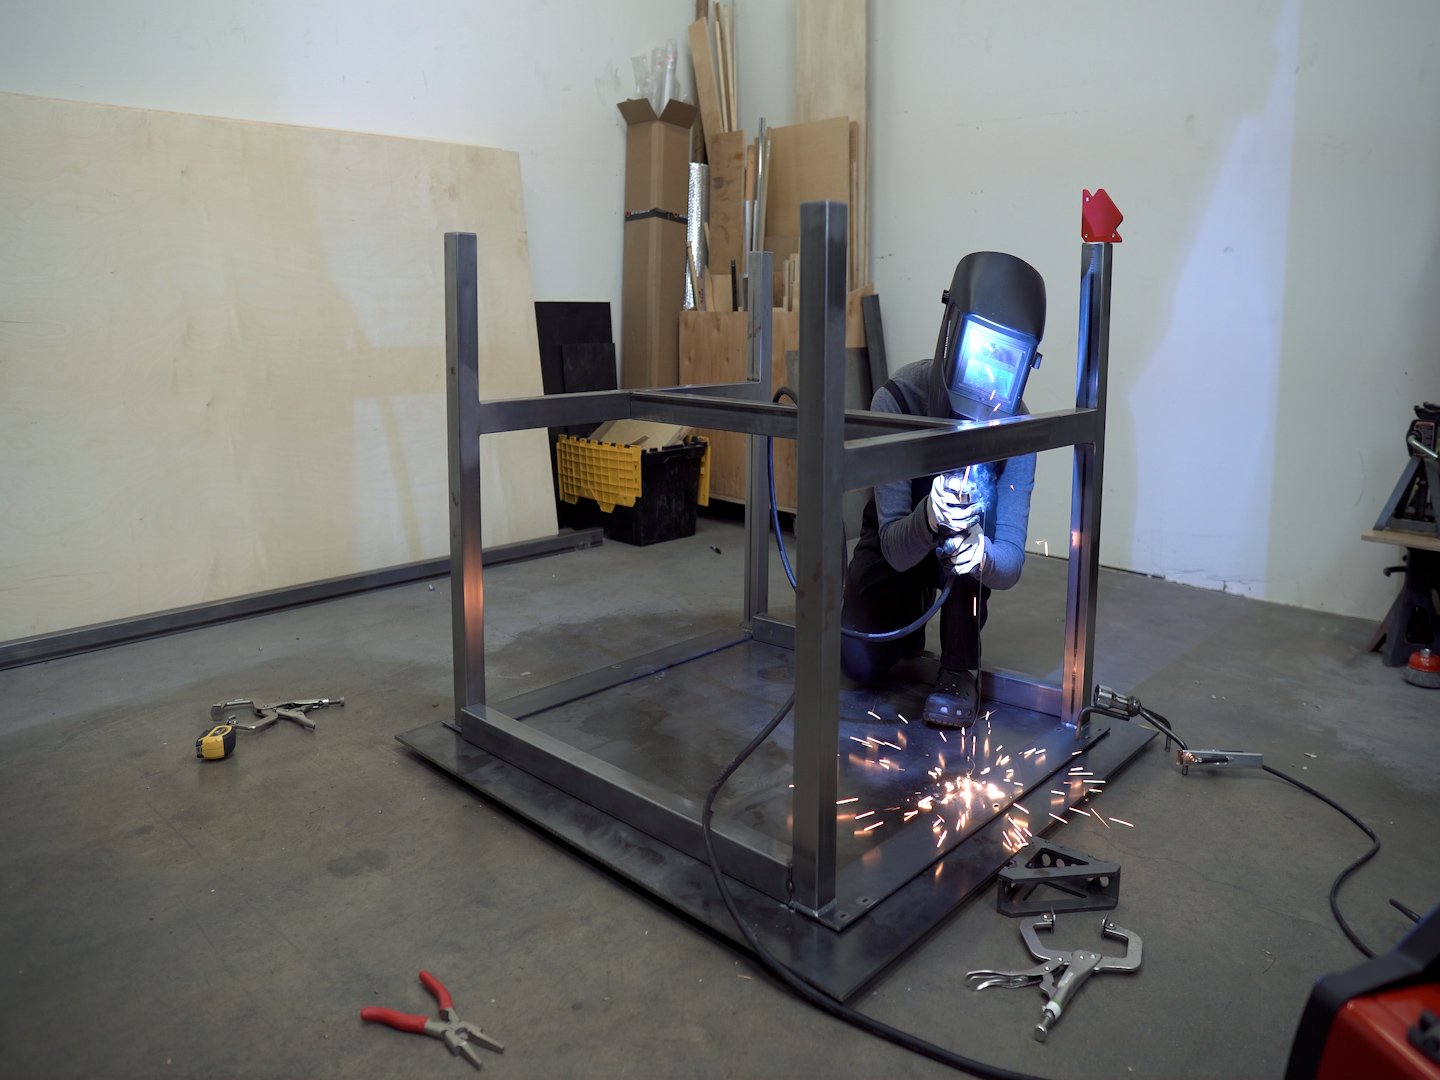
We started with a 4ft square sheet of ¼” thick steel and removed the surface rust using a wire wheel on our angle grinder. We want to keep this page PG, so we’ve taken the liberty to blur out some suggestive rust spots.

We’re going to build this table upside down for a couple of reasons:
1) because our floors are far from level and
2) this way, we can make sure the legs are aligned relative to the steel top.
Once we cleaned off all the surface rust, we placed the semi exact legs on top and placed pre-cut 2x2 square tubes in between to tie the two legs together. These stretchers aren’t necessary, but we wanted to make sure this table is able to handle a decent amount of weight and use, so we took the extra step.


The top stretchers interfered with the welds on the legs, so we cut out a small bevel to clear the beads on each side. Then we marked the position for the bottom stretcher and clamped it in place.


Next, we welded everything together, making sure to switch our welding position from one side to the other to minimize any distortion from the heat.
Then, we flipped the frame over to clean up the spatter and Louis dressed up the weld beads so they look nice.

Then we flipped the frame back over and positioned it on the center of the tabletop and stitch welded it into place.


The legs have threaded inserts on the bottoms, so all we had to do was screw on these locking casters and flip the table over.


A welding table has been on our wish list for a long time and we’re stoked with how this came out!
Onto the assembly table!
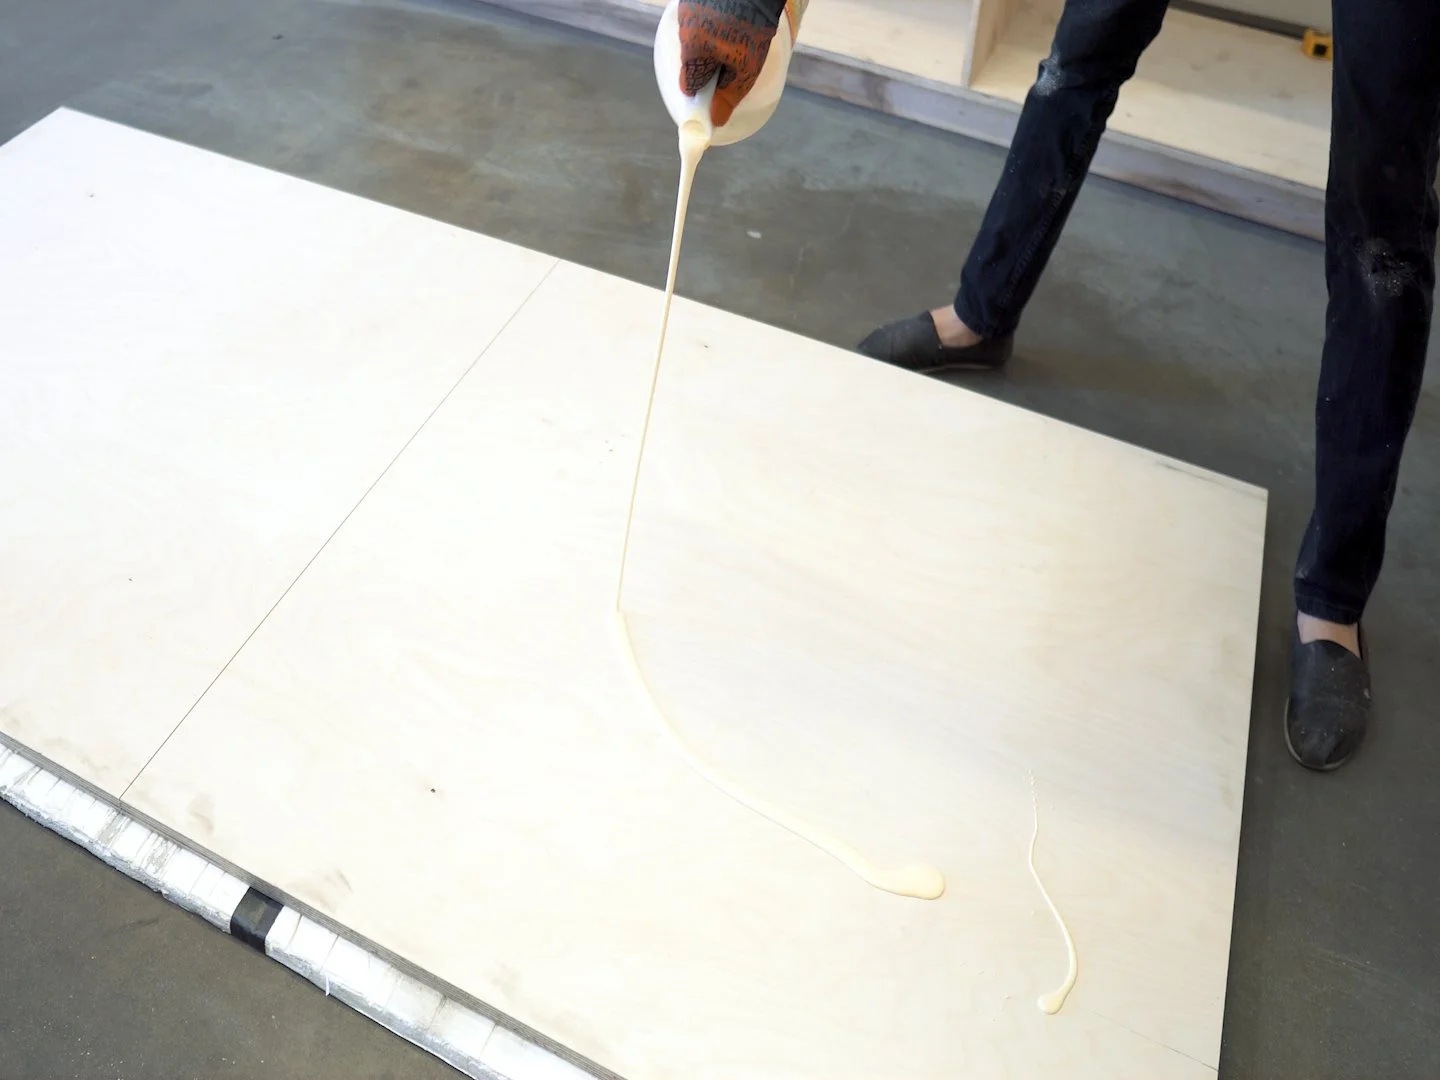
With the welding table complete, we moved onto our assembly table. This one is going to have a simple plywood top. We used our Kreg Accu-cut attachment to cut down a sheet of ¾” plywood in half, so we can fold it over.

We made sure to spread a generous amount of glue on both halves. And what’s a project without one big mistake?
Like a fool, I set the blade height on top of the plywood instead of the track, so the cut was too shallow. Learn from our mistakes, people!
After readjusting the saw and cutting the sheet completely through, we scraped off the saw dust, smeared on some more glue and stacked the halves together.


We clamped it all around and set it aside to dry.

Once it was fully dry, we cut a thin sliver around the perimeter to make sure we have crisp, even edges all around and sanded the with 120grit.

Then we lifted the legs on to the top and screwed them in using 1- ¼” powerpro screws with a small washer to make sure they’re captive on the slots.


We used shorter casters on this table to accommodate for the extra thick tabletop because we forgot to account for this when ordering the legs. It was definitely an oversight on our part, but it all worked out!

Once the top was secured, we flipped it over right side up.

So here are fraternal twin tables, built with the same legs and different tops.

Thanks for reading! We hope you give this project a try!