
How to Install a Roof Fan and Solar Panels
We're thrilled to be tackling our dream project and converting a Sprinter into a camper van!
We know that another millennial couple trying to live in a van down by the river is so cliche. Be that as it may, we are going to document our build process and share it with you fine folks, in hopes to inspire you to jump right in too!
For this project, we show you how we installed the vent fan, DIY roof rails, and mounted the solar panels onto said rails.
You can check out the Youtube video linked above for the entire step-by-step or follow along below. The journey is yours to choose. (We would also appreciate a like and sharing if you think it's worth it :))
All the parts we used for this build are linked below:
(These are affiliate links where we earn a commission at no extra cost to you! Thank you in advance for helping us make more projects like this.)
Fan-tastic Fan 2250 - https://amzn.to/3kzUWAP
100W Solar Panels - https://amzn.to/3kvP0c1
Strut Channels - https://amzn.to/35yh35Q
Strut Channel Nuts M8 - https://amzn.to/35yh35Q
M8 Rivnut - https://amzn.to/35yh35Q
M8 Bolts - https://amzn.to/35yh35Q
Loctite 242 - https://amzn.to/35yh35Q
Sikaflex 252 - https://amzn.to/35yh35Q
DAP Black RTV - https://amzn.to/35yh35Q
OSI White exterior sealant - https://amzn.to/35yh35Q
Parallel Y Solar Connector - https://amzn.to/35yh35Q
Roof Cable Entry Gland - https://amzn.to/35yh35Q
1 x 2" poplar boards: https://amzn.to/35zrYvT
1.25" Aluminum angle: https://amzn.to/35zsiuL
Pop rivet tool: https://amzn.to/3hvvkCy

We chose to use the Fantastic 2250 model which is the lower-mid range of the product line up. A popular choice is the Maxxair 7500 which is top of the line and out of our budget: https://amzn.to/3kkQAgf
We chose the Fantastic fan because it has 3 fan speeds, reversible fan direction meaning it can pull air in from the outside or push air out from inside the van. It has a built in thermostat, so the fan can automatically turn on and off depending on the temperature you set it. It has all the basic functions you'd need for a fan and about 1/3 of the price of the top tier models, so it's perfect for our build.


The fan comes with a foam template that we used to position the cut out on the roof and trace the cut lines. (Note: it wasn’t super accurate so we recommend tracing the base of your fan!)
Luckily, we found that the first generation Sprinter vans have a section on the roof, adjacent to the sliding door, where a factory fan or passenger AC unit mounts. It was a perfect place to mount the fan and there was no interference with the ribs or other structural members.
Also, keep in mind that we're going to install sliding windows toward the back of the van, so placing the fan here allows enough distance to get good air circulation when we have the windows open in the back.
After tracing with a marker, we took off the template and laid painter's tape along the perimeter to help prevent scratches from the jigsaw shoe when we cut out the hole.


Using a step drill bit, we drilled a ½” hole near each of the corners, so the jigsaw can articulate from one side to the next. We used a fine tooth - metal cutting blade to cut out the hole using a jigsaw. Cutting sheet metal with a jigsaw is so loud, so make sure to have some hearing protection.
PRO TIP: To minimize the clean up inside the van, we taped a large garbage bag underneath our cut line to catch the metal shavings.

Before removing the painter's tape and the garbage back, we sprayed some semi-gloss white paint to seal the bare metal edges. Once the paint dried, we removed the tape and cleaned up the perimeter with some simple green and a rag.

We then cut some 1" x 2" wooden boards and drilled pocket holes to make a frame for the fan. This frame will be mounted under the fan from inside, essentially sandwiching the roof skin between. It gives extra material for the fan mounting screws to bite into as well as support for the finishing trim once the ceiling panels are installed.


We used Bostik 70-03 seam sealer not for any reason over the other brands besides we had a few tubes from a previous project. Another popular choice of sealant is Sikaflex 252 which is a bit easier to find than Bostik. The supply list above links to Sikaflex.
After laying down the sealant, we placed the fan into position making sure to give it a shimmy from side to side so the sealant can spread out.
The hinged portion is facing toward the front of the car. This is important because the fan is a perfect square and can fit in any direction. You want the opening away from the direction of travel (i.e. forward) because the opposite way will cause a parachute effect and rip the cover off when traveling down the highway if left open.


While one of us held the wooded frame underneath, inside the van while, the other drove a couple self-tapping metal to wood screws in. We used 1-1/4” long screws which were too long and we later ground those flush with an angle grinder. 1” screws would have been perfect.


After all the screws were in, we taped the perimeter of the fan and generously applied exterior window sealant around the seams and screw holes to prevent any leaks. There are some discussion about using regular sealant versus lap sealant. After looking through the technical specs for both products, we found the only major difference is lap sealant can be self-leveling. Otherwise the estimated shrinkage, temperature constraints and other variables are relatively similar so we had the exterior sealant on hand and that's what we went with. Here's a link to a popular lap sealant if you want to go with that! https://amzn.to/3mnrFuj
To finish up the fan install, we peeled off the cellophane and called it done.

Rather than using off the shelf roof rails, we used low profile aluminum strut channels that are 6ft long. Unlike the newer body style, our 2005 Sprinter doesn’t have OEM mounting locations so we used three M8 rivnuts to secure each of the channels. Using a step bit, we drilled a hole large enough for the rivnut to sit into snugly.

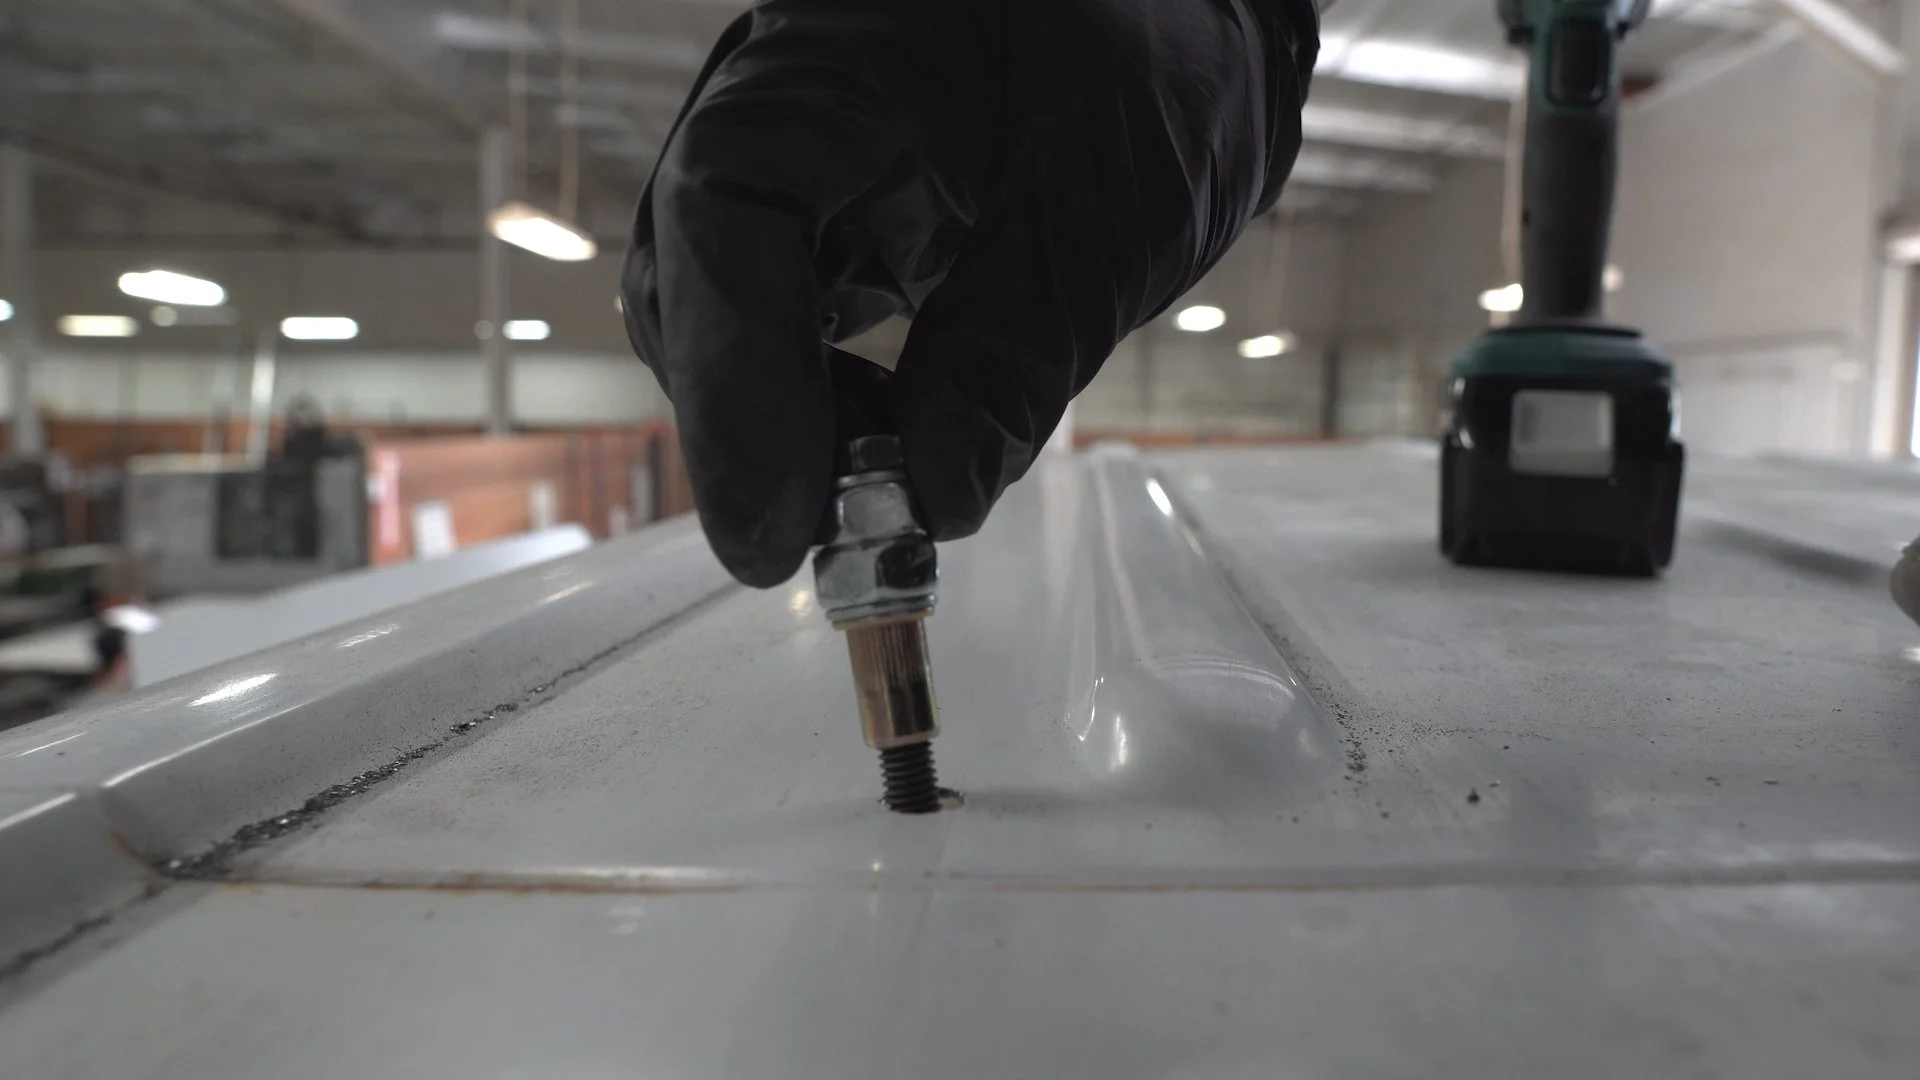

There’s no need to buy a special rivnut tool, you can use along bolt with the same thread pitch as the rivnut, a couple nuts that are larger than the bolt (we used M10 nuts) and a couple washers.
Once you have all the pieces threaded together, just insert the assembly into the hole and tighten the bolt using the impact drill while holding it upright by the nuts with the wrench. By tightening a little bit at a time, you’ll start to feel the rivnut compress.
Once the tightening resistance increases again, you can just loosen the bolt and the rivnut will stay in place. Be sure not to over tighten the bolt because it could strip the knurls on the rivnut after it’s compressed and it’s a pain to get out.
If you're still apprehensive about using this method, here's the rivnut tool: https://amzn.to/2RpZpJ9


Using 1.25” angle aluminum, we cut them to length to have four - 2ft long pieces that we can attach on the short sides of the panels.
We made slotted holes on the sides mounting on the rails by measuring two equally spaced points, drilling holes slightly larger than a M8 bolt, cutting out the material between the two holes with a jigsaw and filing the edges smooth.
It's not absolutely necessary to make the holes slotted, but we thought it would give a little extra adjustability when mounting.


We measured three equally spaced points along the length of the other leg and drilled holes slightly larger than the 1/8” rivets we’ll use to attach onto the solar panels.

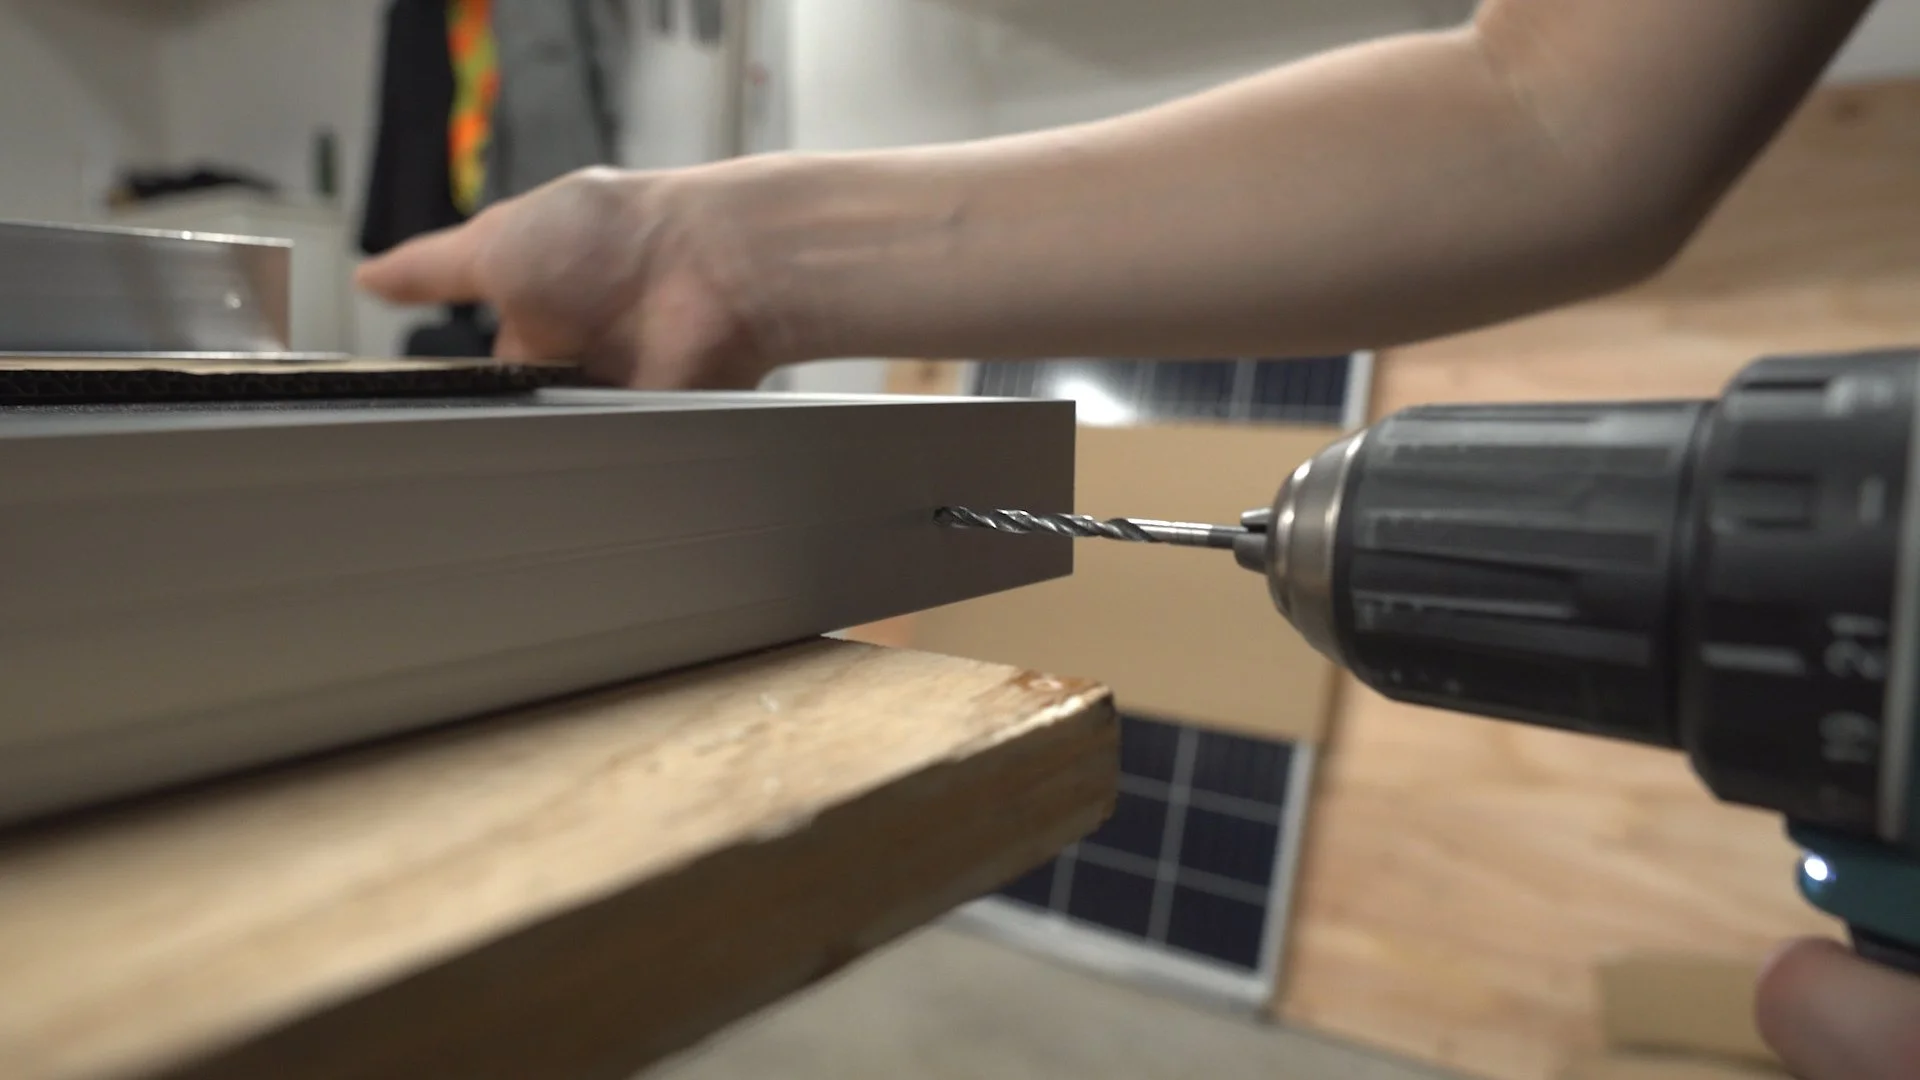


Since the length of the angled aluminum is shorter than the width of the panels, we just roughly centered it and transferred the hole locations with a marker. Using the same drill bit from before, we used our hand drill to drill through the holes we marked on the solar panels.
We made sure the holes are aligned by fitting the rivets through the angle aluminum and into the solar panels before fastening. Then we fastened the rivets using the rivet tool.
If you’ve never used a rivet tool before, it takes a few pumps of the handle before there is enough tension to deform the tail break off the mandrel which is the piece that sticks out and goes into the tool.
We fastened the rest of the brackets with rivets and ended up with a pretty sturdy mounting solution.


Before we can finish installing the roof rails and the panels, we had to address all the surface rust on the roof. There are seams where sections of the body overlap and are spot welded together which is a big issue with water leakage on some vans. Also, for our van it looked like someone drove through something with low clearance and scratched through the paint in some areas. So we used a wire wheel to remove the surface rust and sprayed a coat of rust inhibitor.
We applied a bead of the same sealant we used when mounting the fan, Bostik 70-03, on the seams and smoothed it out with our finger. Since the sealant is paintable, a nice coat of fresh paint should make it look relatively OEM.


Once we positioned the rails over the rivnut locations, we slid in the channel nuts that will be used to mount the solar panels onto before tightening the mounting bolts for the rails.
We used a large diameter fender washer for the mounting bolts to make sure we have enough surface area to provide good clamping force and some blue Loctite on the threads to make sure the bolt doesn’t loosen due to vibrations on the road.


With the rails attached to the roof, we placed the panels on top aligning the slotted holes on the brackets with the channel nuts. We used a parallel wiring harness adapter to connect the two solar panels and routed the output connectors between the two panels.
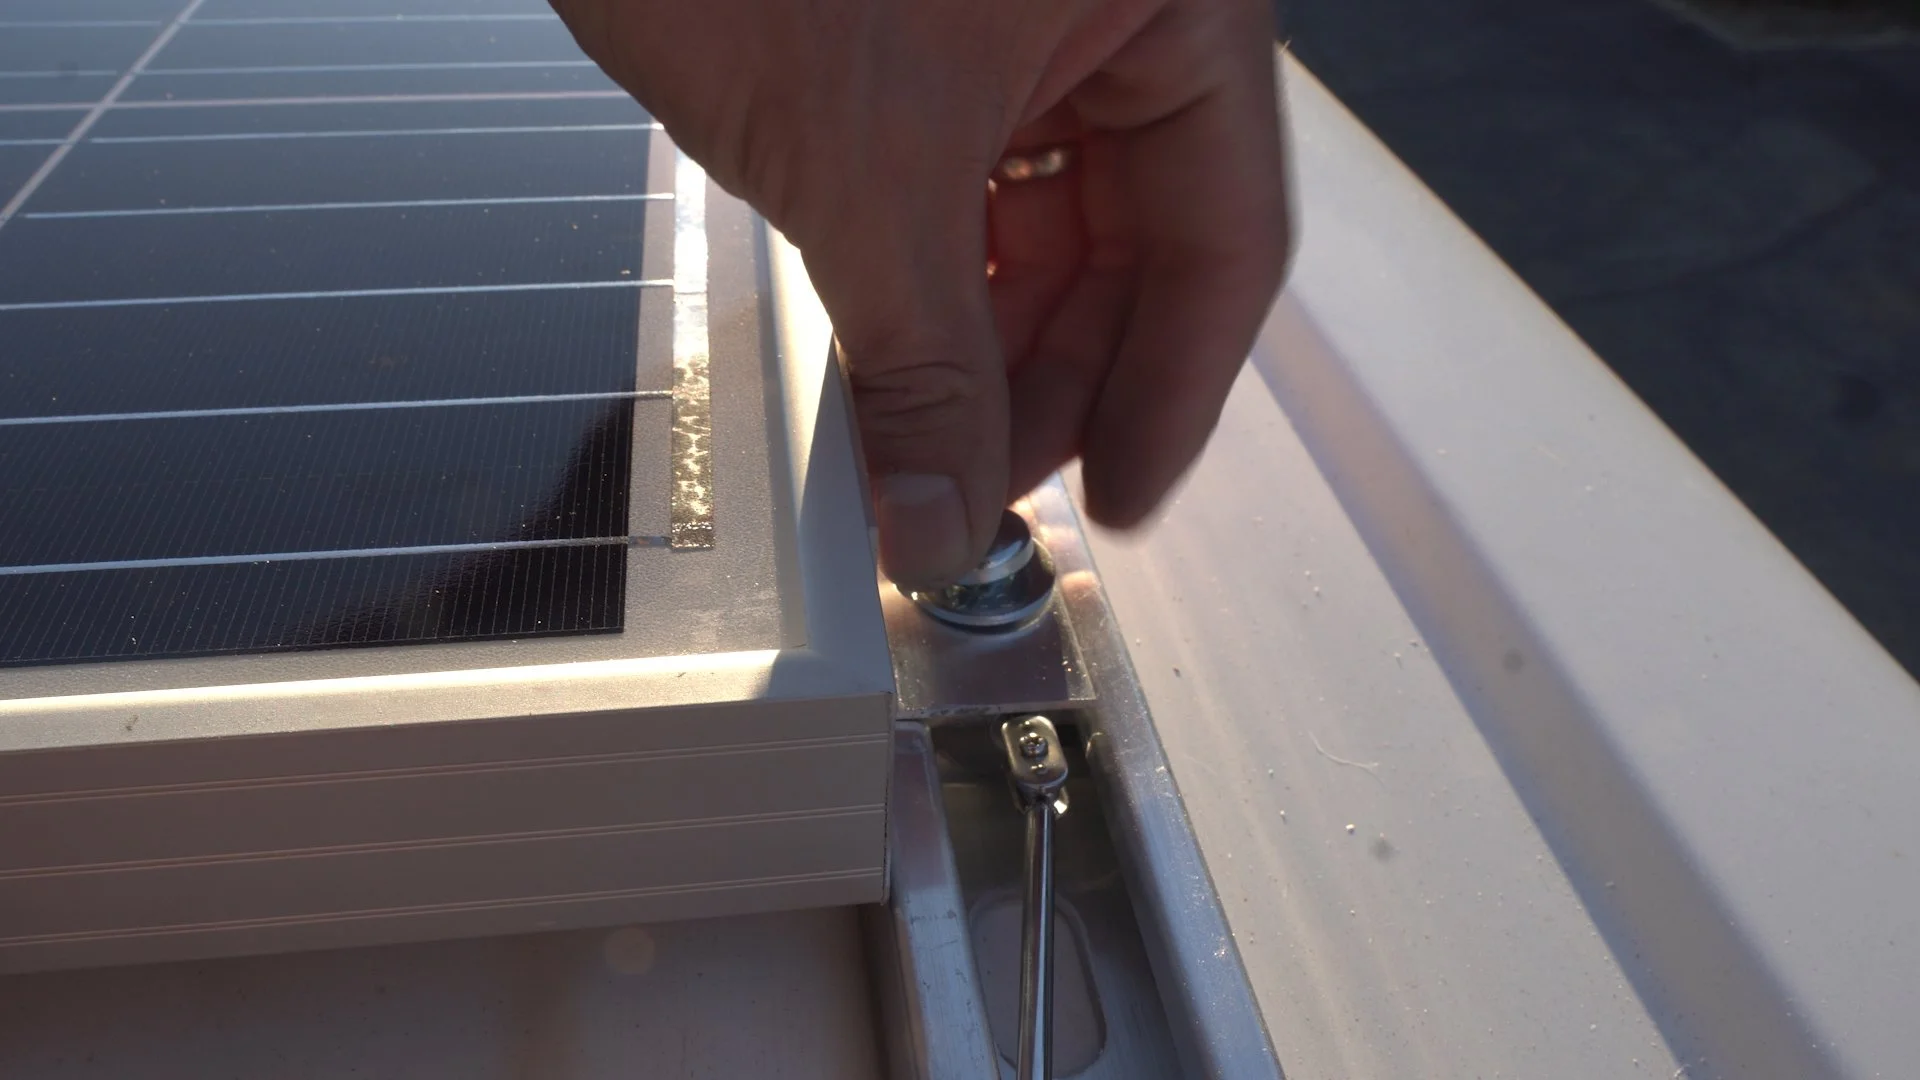

Since the mounting bolts were a little short, we used a magnet to hold the channel nuts high enough for the bolts to catch a few threads. We used blue Loctite on these bolts as well and torqued them down with an impact.
If you really wanted to be proper, you should get a torque wrench and manually torque the mounting bolts down to around 30 ft-lbs or so, but I think the impact driver is good enough. Do what makes you happy.

We chose to have the electrical area toward the middle of the cargo area, so placing the cable gland between the two solar panels was the best location for our setup. We used a 1.25” metal hole saw, cleaning up the edges with a file and spraying the raw metal edges with paint.


We installed MC4 connectors on 12 gauge wire to connect with the parallel harness and fed the wires through the gland. We’ll go in more detail about the electrical setup in another write up!
To seal up the mating surface, we used some DAP silicone sealant generously along the flange and used self tapping metal screws to fasten it to the roof.

That's it! If you've followed along this far, you deserve a nice beverage.
The installation was an overall success and we couldn't be happier with the results. Several long highway trips have proved that everything is mounted secure and safe.
If you liked the project, don't forget to share it. Comments and feedback are always welcome.
You can check out our other projects here on our website, as well as our Youtube channel, IMEE MADE.
https://www.youtube.com/c/imeemade
Thank you for reading!