
How to Make a Composting Toilet for Vanlife
Recently we got a 140" wheel base Dodge Sprinter to convert to a camper for long road trips and camping adventures.
One thing we absolutely had to have is a toilet inside the van. After researching some pre-manufactured toilets, we quickly realized it was out of our budget, so we decided to DIY our own solution.
Today, we'll show you how we made our own Composting Toilet.
We won't go into detail regarding the dimensions because this will vary for each persons' build and size constraints, so we want this to serve as a general guide on the overall approach to build your own.
Here is the list of supplies we used:
(These are affiliate links and we earn a small commission at no extra cost to you, Thank you!)
4ft x 8ft 3/4" pre-finished plywood
1.25" screws: https://amzn.to/3qwqvgO
Toilet Seat: https://amzn.to/3cpEzUv
Piano Hinge: https://amzn.to/3sZ6Ac4
Soffit Vent: https://amzn.to/38juA1B
Adhesive Sealant: https://amzn.to/38juA1B
Computer Fan: https://amzn.to/38juA1B
Starbond CA Glue: https://amzn.to/38juA1B
Starbond Accelerator: https://amzn.to/38juA1B
Cereal Container: https://amzn.to/38juA1B
Urine Diverter: https://amzn.to/38juA1B
12V ON/OFF Switch: https://amzn.to/38juA1B
PVC Adapter with Plug: https://amzn.to/38juA1B
5 min Epoxy: https://amzn.to/38juA1B
Compostable Trash Bag: https://amzn.to/38juA1B
Liquid Container: https://amzn.to/38juA1B
Leather Pull Strap: https://amzn.to/38juA1B


Before we began building the actual toilet, and even before we put up the walls, we knew we’d need a vent hole to keep our toilet box and van stink free, so we started by drilling into the side of the van.
At this point, we only vaguely knew that we wanted the compost toilet behind the drivers seat, so we picked a random spot and went for it.
We used a 2” metal hole saw and started to cut from the inside of the van. Then we finished cutting the hole from the outside of the van because we thought it might help with keeping the burrs from getting out of control.
Next we grabbed a 2” soffit vent with a pool drain hose to use as the venting channel. We applied an adhesive sealant on the soffit vent flange to adhere it onto the van and used duct tape to connect the hose to the vent. We left the length of the hose long so we can cut it to size once the walls were up and we put the toilet in place


We used pre-finished ¾” plywood and started making a basic box by attaching three walls and the bottom floor with 1.25” screws using simple butt joints, making sure to predrill and use a square along the way. You’ll see that we cut a hole on the back panel in the area where we installed the soffit vent on the van.


Next, we added a divider panel that will separate the business area and the storage, where we’ll keep the toilet paper and cleaner.
Then we drilled some pocket holes on the walls so we can attach the front panel.


We had an old computer fan laying around so we mounted it on a piece of scrap ½” plywood with a hole cut out in the middle to act as a spacer to allow airflow. We attached it to the back panel over the hole we cut out for the vent.


We want the business area of the toilet to be sealed off from the rest of the structure, so we can contain the smell, so we’ll be creating a lid to box out the area. To start, we attached a 3” wide strip along the back that’ll be used to anchor the toilet seat lid.
After measuring the height of the lid in the closed position, we added a small piece onto the front panel to act as a positive stop. We used CA glue and activator to hold it up while we secured it with 1.25” screws


Then we added the toilet seat lid. We attached it with a couple piano hinges so it can lift up and we can access the area underneath.
We placed the toilet seat on top and traced the mounting point and the seat opening.

We drilled out the mounting holes first. Then we used a jigsaw to cut out the opening. We had to trim a few times to get the size just right. You want the hole to be larger than the opening of the toilet seat. having about 1" around the outside perimeter of the seat seemed to be the best balance.


The toilet seat installs with the provided hardware and once that was on, we placed the urine diverter about half way in the opening, attaching it with screws.
The urine diverter is the key to having a virtually stink free composting toilet. The combination of the liquid and solid is what makes the prominent sewage smell.


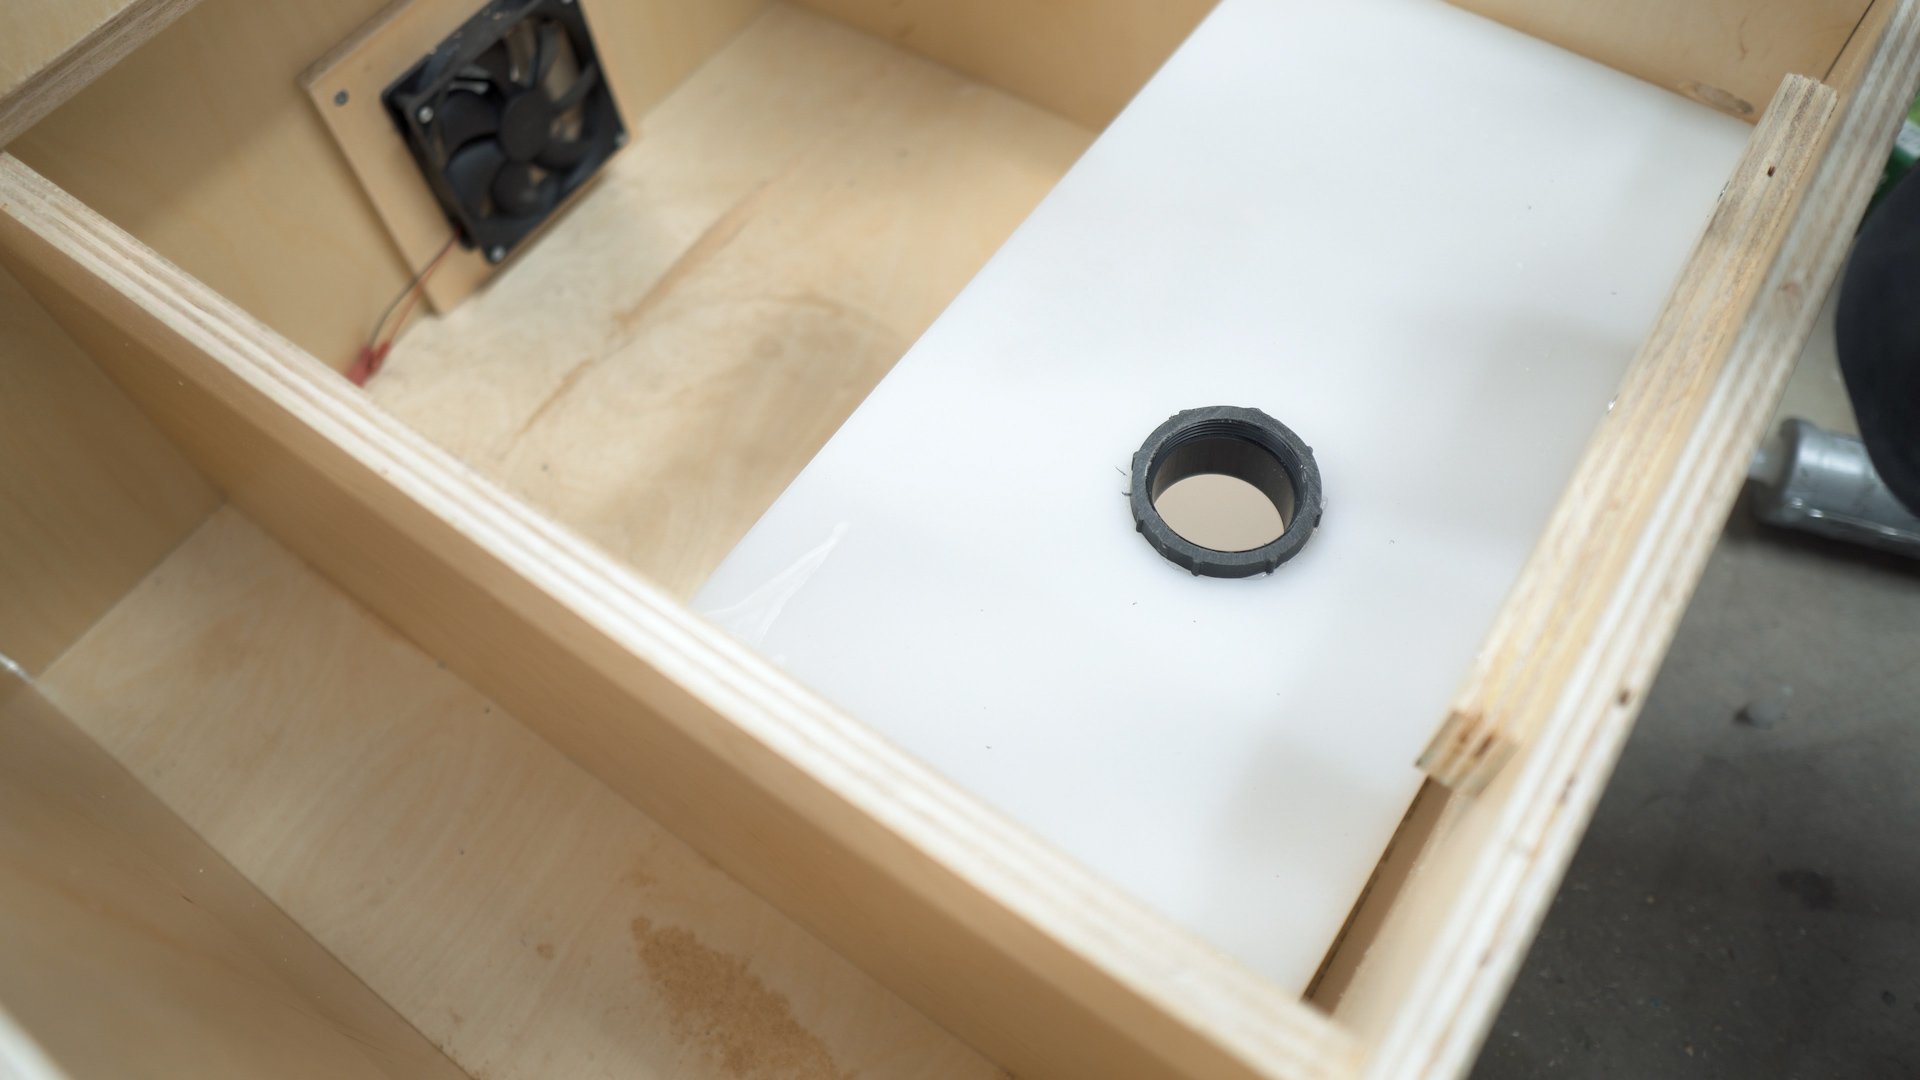
With the diverter in place, we can mark the position of the spout on the liquid container. Using a 2” hole saw we cut out the hole, and used this PVC drain pipe fitting and glued it in place with 5 min epoxy.


While the epoxy dried, we sealed all the corners with silicone. This will help contain any odors and any leaks should there be any.
Then we secured some scrap pieces down with brad nails to help keep the urine container from sliding around when we drive.


Before putting on the top lid, we drilled a hole for the rocker switch that will turn the exhaust fan on and off. We plugged the connections in and fished the remaining wire through a hole going into the storage area.


With the wiring complete, we added a couple strips of wood to keep the #2 bucket from shifting around while driving


We drilled a ¾” hole with a forsner bit about half way through the wall, so we can use this ¾” dowel as a stopper to hold the toilet lid up when we need to access the area underneath. We also added a simple leather strap to help pull the lid up.


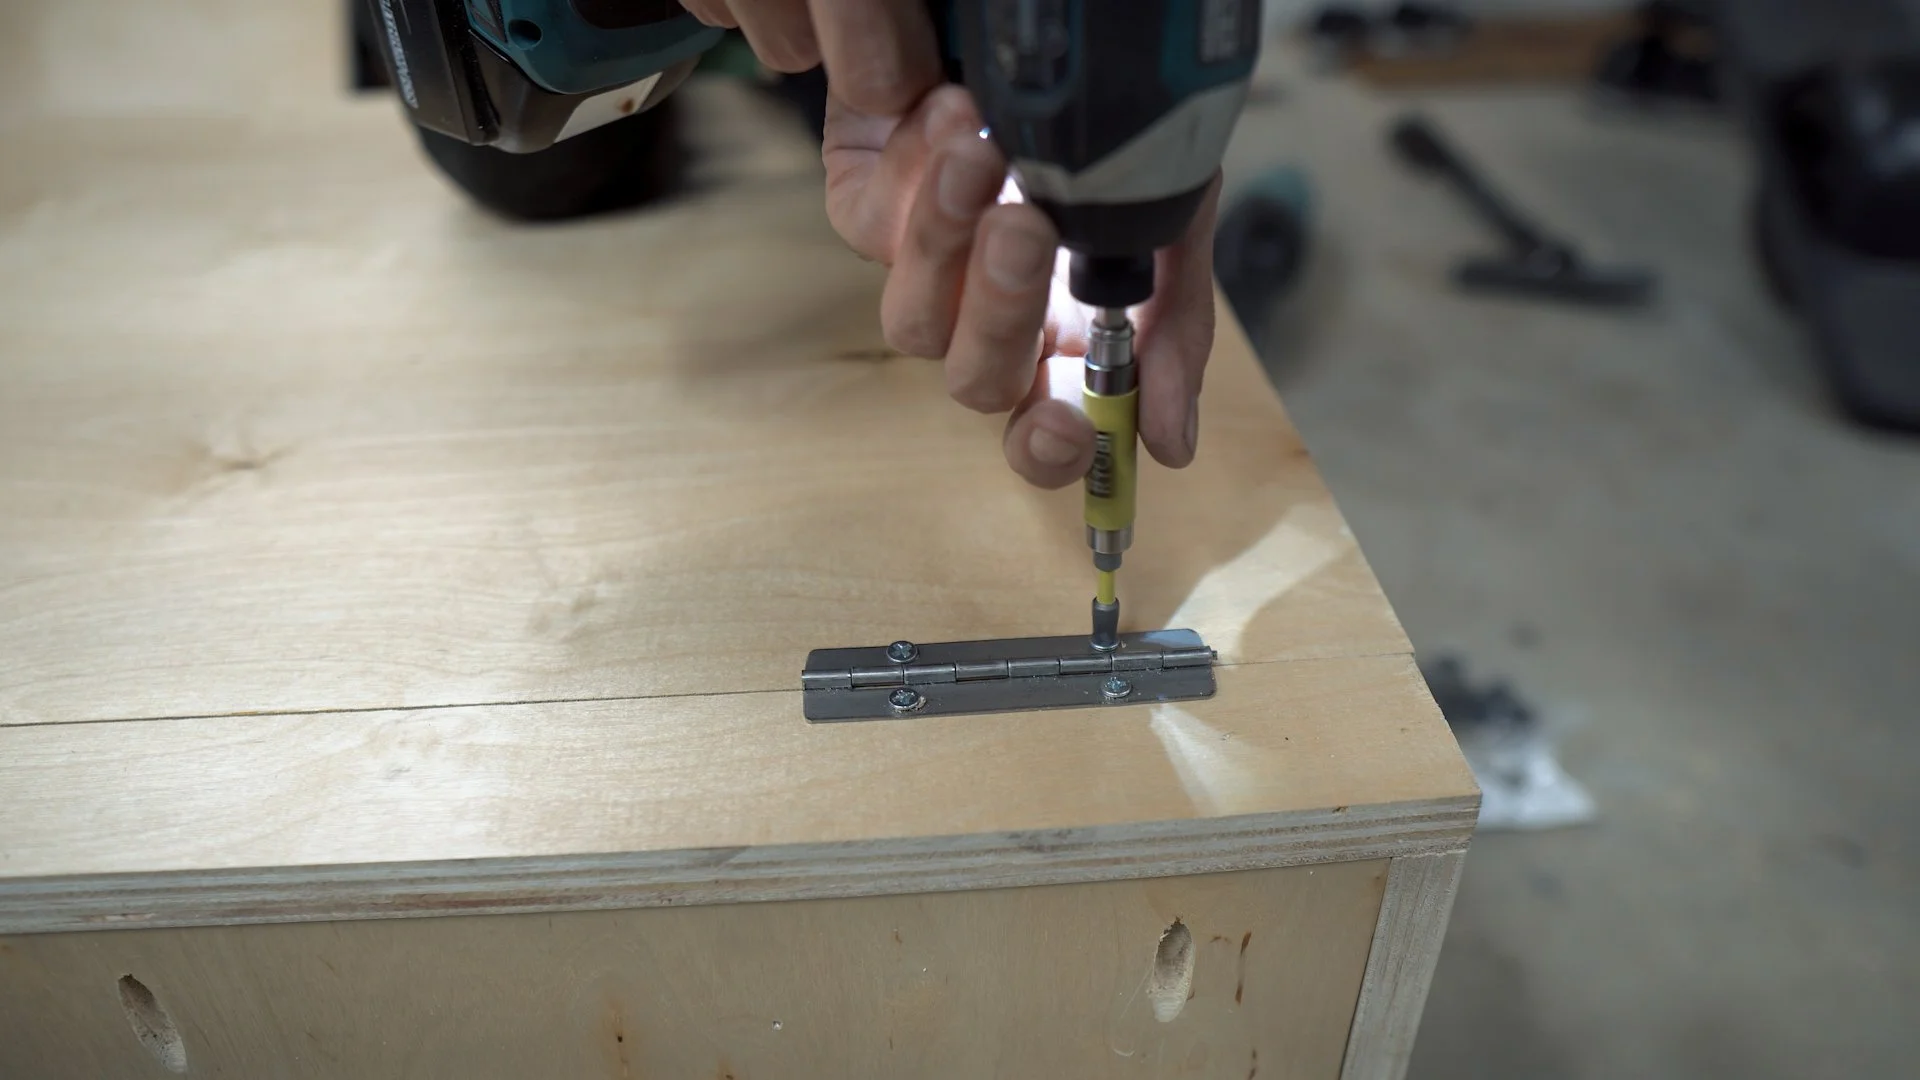

We attached the 2” wide strip along the back portion of the box. Then we put on the top lid and secured it with piano hinges, adding a lip to the front edge using pocket holes.


We brought the toilet into the van and slid it into place making sure to line up the exhaust hose we attached earlier to the hole we drilled in the toilet box. Then we secured it with 2” screws along the back wall and the floor.
When we had originally installed the walls and the batons behind the walls, we marked the height and locations so we can screw in furniture items into the baton struts for security.

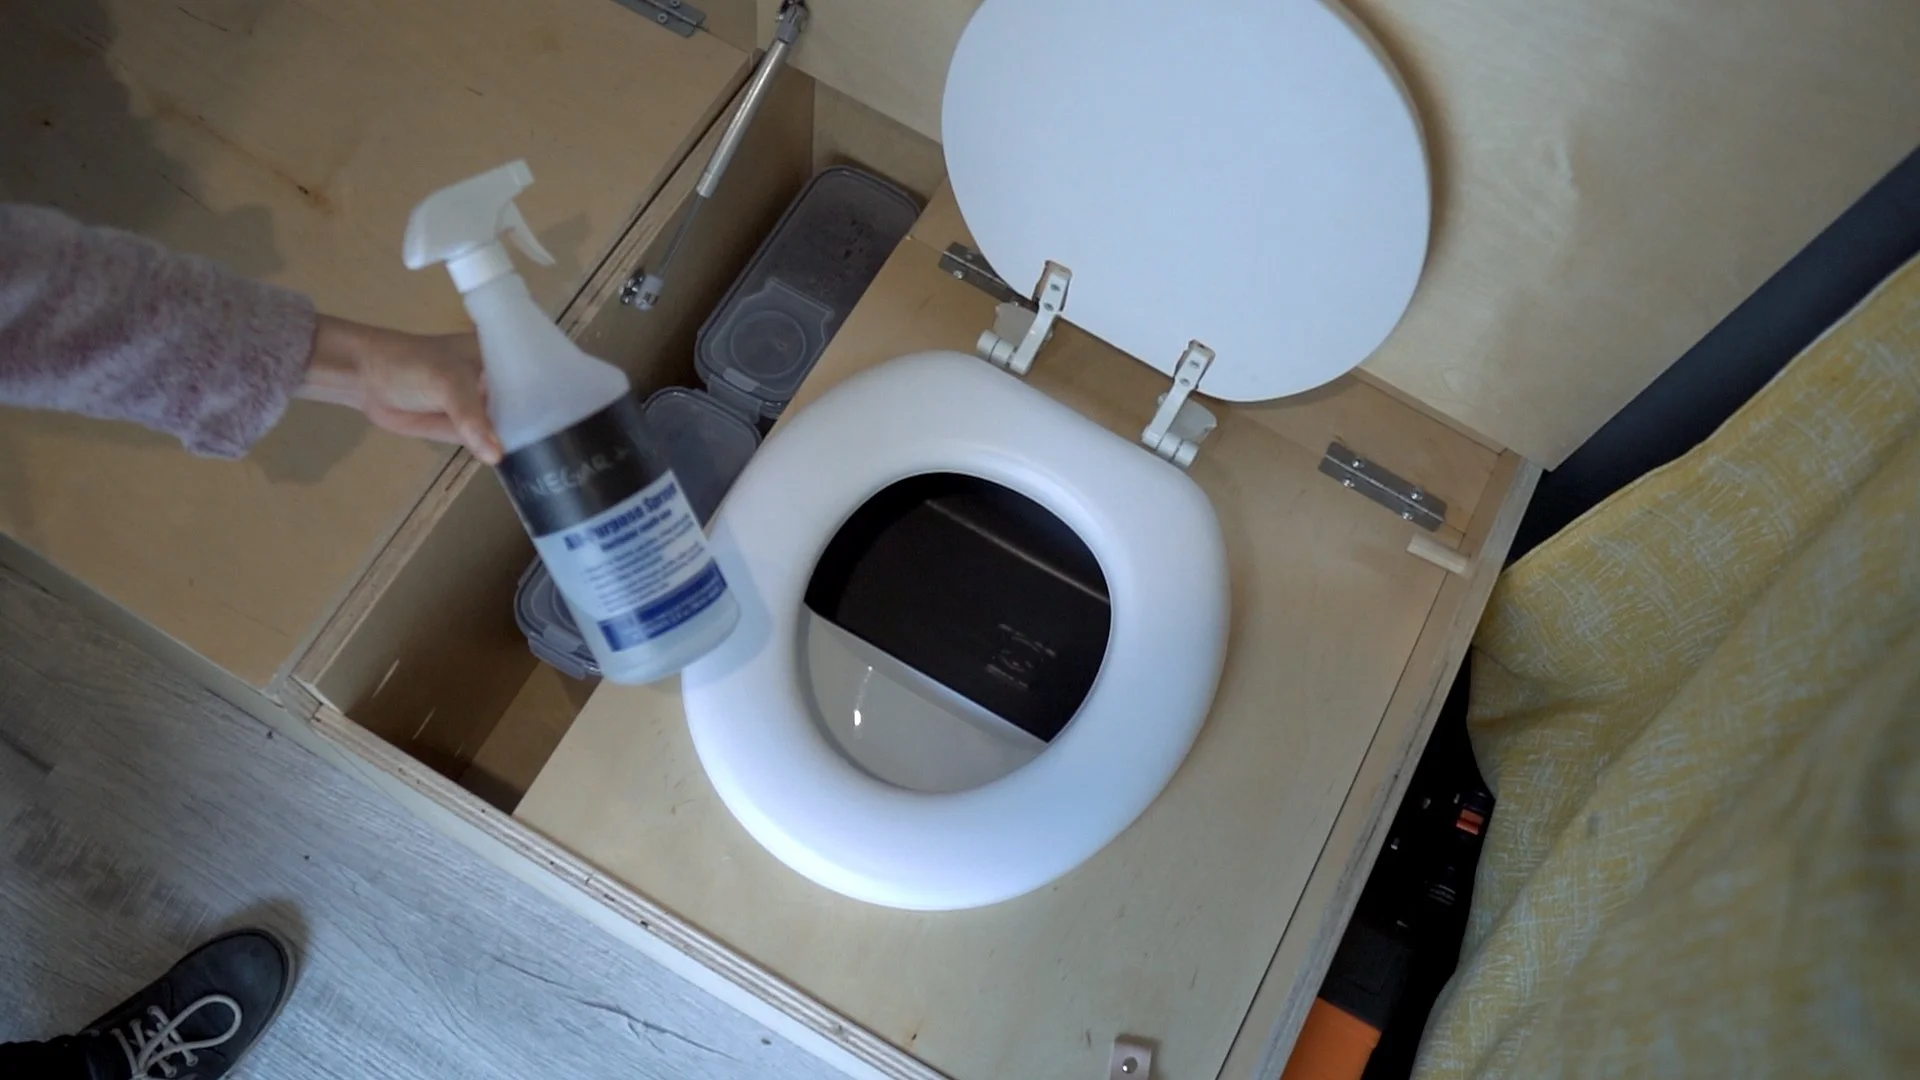

With the toilet secured in the van, we used cereal containers to hold the peat moss for composting, and a bottle of vinegar and water solution to use as disinfectant. They fit neatly into the side compartment with some toilet paper.
We keep a roll of composting trash bags that fit the #2 bin in the compartment underneath the toilet seat lid.


After a few weeks on the road, we love our composting toilet and the added comfort having it in the van. It saved us a handful of times when there were no public restrooms available. The computer fan came in clutch to reduce odors while we were using it and we found it’s Crucial to completely cover your #2s with peat moss to minimize odors. And with the box closed, the van was virtually stink free.
We found a few things that could be improved. We built the toilet to accommodate both of us (6ft and 5ft) which led to a shorter than average seating height. So the liquid container we chose was wide and short to fit the available space. We found that it’s not conducive to bumpy roads when it’s more than half full as it splashes around. We see why other builds used taller jugs to avoid this from happening. Also, in order to lift the liquid container out of its spot, we wrapped a strap around it to use as a handle, but it’s not the cleanest solution. We’re still brainstorming a better fix. Last but not least, we added a gas strut to keep the top lid open because it had a tendency to fall when the van was not level.
UPDATE (January 2022): After a full year with the van, we found a few improvements to our toilet setup. The urine diverter and separate urine container was a great idea and served its purpose, but it was a pretty clumsy design in practice. Having to empty the urine container was messy at times and occasionally it would splash out of its container when we’re on bumpy roads.
One of our Youtube viewers commented that they used pine pellets as an affordable alternative to peat moss or coco coir. We found that pine pellets are used for animal bedding such as cats and horses and it absorbs liquid and odors well. You can find them here: https://amzn.to/3uaV9lx
We decided to ditch the urine diverter and the urine container, rotated our #2 bucket 90 degrees, and lined it with a trash bag and pine pellets, so all the waste goes into one bucket. Although this means that the option to compost the #2 separately is no longer available since it’ll be mixed with liquid waste, it does make the setup infinitely easier to use and maintain. There is virtually zero odor with this new setup and will be a design we’ll implement in future van builds too!
Thank you for reading!
If you liked the project, don't forget to share it. Comments and feedback are always welcome. You can check out our other projects here on our webpage as well as our Youtube channel IMEE MADE.